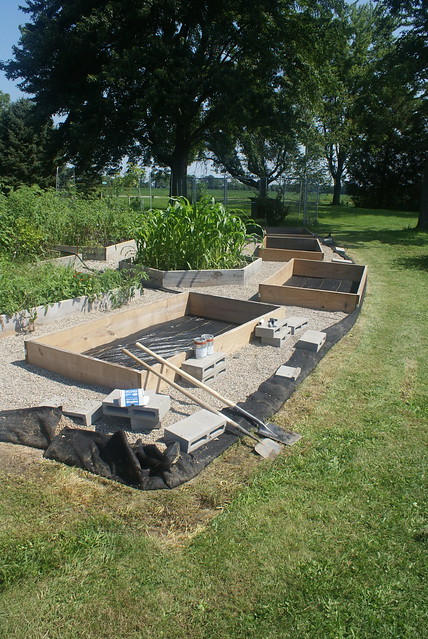
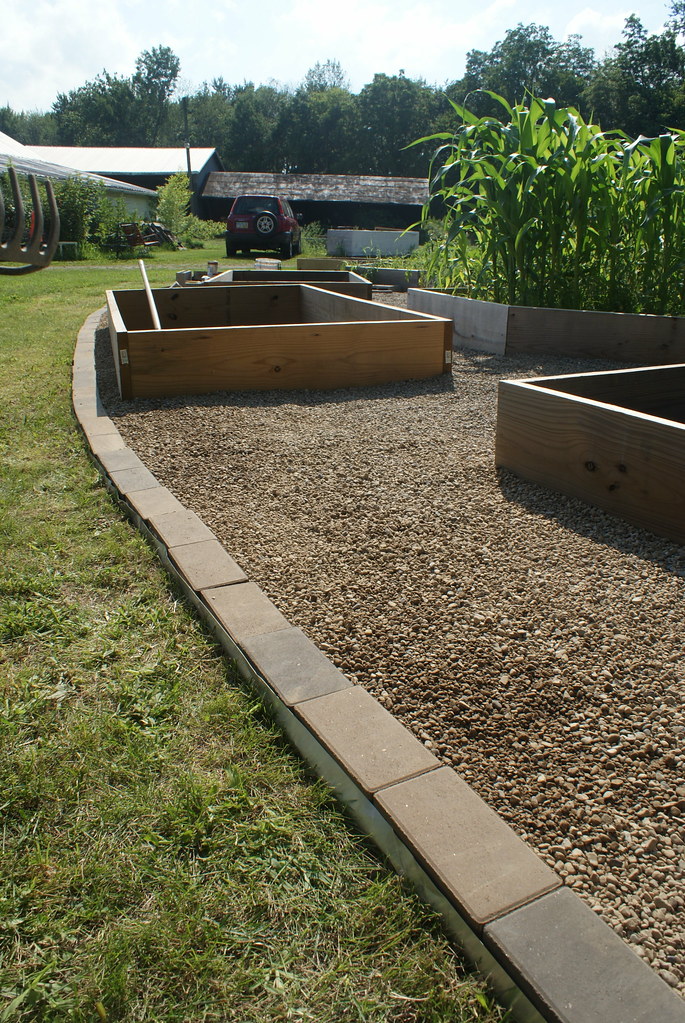
For the past few years we have spent significant time, energy and materials converting large areas of our overabundant lawnspace over to raised beds for annuals and herbs. Overall, this has been a success and a time-saver, but one of our biggest challenges has been dealing with the edge-space… where garden beds and grassy lawn meet. And our large numbers of beds mean we have a LOT of edge space to deal with.
We've tried a few different approaches, and learned some lessons the hard way. For example:
1. DO NOT have your raised beds directly against your lawn (i.e. no border between them). This is a recipe for a nightmare of upkeep, as the edge is difficult to keep trimmed and most types of grass are only too happy to send runners under the edge of your garden beds and into your garden soil. Nothing is more disheartening than carefully constructing raised beds, only to have them completely colonized by quack grass or Johnsongrass rhizomes within a year's time.
2. Grass and weeds are just as happy (and sometimes happier) growing on the topside of a landscape fabric/gravel combo as it was growing underneath it before you tried to destroy it by piling a bunch of heavy dark stuff on top of it. This arrangement certainly helps, but is no silver bullet.
In a fantasy dreamworld where money is no option, we'd simply purchase bulk quantities of fancypants milled aluminum edging material (which runs about $2.33/foot in it's basic, non-colored form BEFORE freight shpping), laughing while I light a cuban cigar with a burning fifty-dollar bill. Of course, then we'd probably also be paying other people to install it as well… also not happening.
In reality, we needed to devise a lawn edging "system" that met the following requirements:
- Non-degrading, non-toxic, lifetime-ish durability (i.e. not plastic)
- Equally capable of forming graceful curves and sharp edges
- Cheap and easily acquired.
- Relatively easy to prep/install without expensive specialized tools.
- Fireproof (so I can weed with our propane torch).
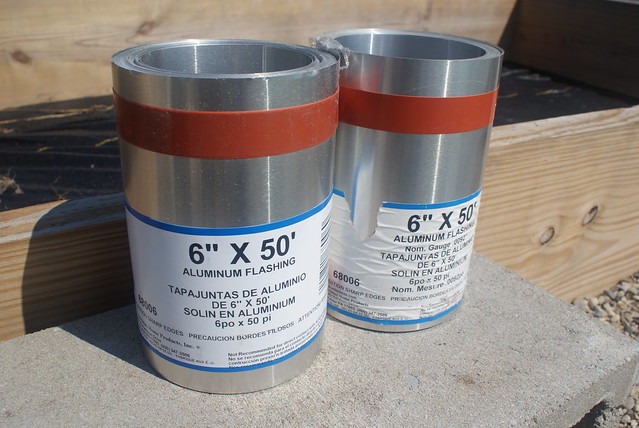
After a good amount of research, it looked like my material of choice was going to be aluminum gutter flashing. Looking online, I found a lot of instances of people discussing using aluminum gutter flashing as an edging material, but the few pictures I found looked like... well, they looked bad. I do believe there's something to this idea, and hoped that the results could be both practical and nice looking. So we're posting this up here to document how we decided to approach this project in the hope it might be helpful to others.
As with all our "How-To" segments from here at the farm (and most of the stuff we do), I must stress that this technique is essentially experimental. I am NOT saying that I know this is a time-tested method, or that I am an expert of any kind. I come up with stuff like this because I'm cheap and we prefer to DIY things around here whenever possible. If this ends up being a horrible catastrophe, I'll come back and update this with all the specific things I did wrong. That said... onward!
Materials:
- Landscape Fabric (I use DeWit Pro5 5oz weed barrier fabric because it is great).
- Lanscape Fabric staples
- Pea Gravel
- 6" Aluminum flashing.
- Digging spade
- Power drill with 1/8" bit.
- Pop riveter
- GLOVES The flashing is very, very sharp. So sharp. Seriously, wear gloves.
- Thousands of bloodthirsty mosquitoes (not recommended, but we had them)
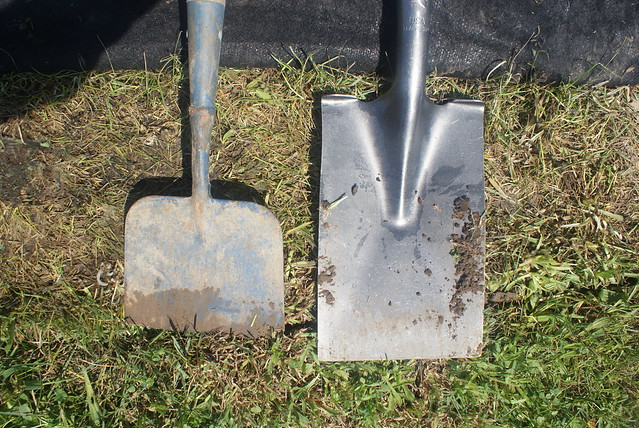
What I really wanted before starting this project was a nice, pre-sharpened spade, made of good steel with a metal handle. I'll get one eventually, but I was in a pinch this weekend (and the current home collection is mostly scoops and shovels) so I picked one up at Home Depot. I don't expect it to last a lifetime, exactly, but I'll get some good use out of it for what I paid for it.
I started out first thing Saturday morning by sharpening my new spade. Most tools you can buy at Home Depot/Lowes, etc. nowadays are not sharpened at all when you purchase them. I suspect many people think that digging chores are awful at least in part because they're doing it with a dull tool.
I just recently learned what a treat it is to work with a sharp shovel as opposed to a dull one, and as such I am making it a point (no pun intended) to keep my digging tools as sharp as possible from now on. [Link to a good How-To] Ten minutes on the porch with a metal file, and I had both my new shovel and my lawn edger tool with a nice new edge on them.
I started by peeling back and weighting in place the landscape fabric that I had installed last weekend. You can see where it was killing the grass. I then mowed the area on the lowest setting, making sure the grass clippings were flying away from (not into) the garden beds.
I began digging the edge line, straight down to a depth of about 5". This will eventually become the line at which I will install the flashing, and will be the visual break between the bricks and grass... so taking one's time and making sure the curves are smooth and the straight parts are straight is crucial. We didn't have too many straight parts in this part of the garden, otherwise I would have laid them out with some rebar spikes and mason line.
It's important to make sure this line is close enough to the landscape fabric. In most places I simply followed the curve of the edge of the fabric itself, and it turned out fine.
After you've done a decent length, you can go back with your spade and dig down diagonally from the garden side, to meet the vertical cut you just made. You're essentially cutting out a thin wedge of sod/turf.
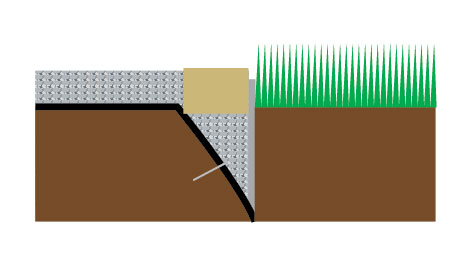
At this point it's a good idea to go through with a trenching shovel (if you have one) or a trowel and clean out all the loose dirt and debris out of the channel. Make sure the lawn side of the channel is as clean and straight/vertical as possible. From the side, you want it to look like this:

Keeping an even and sufficient depth of this channel is very important, as the flashing installs MUCH easier if you're simply dropping it in a channel that's deep enough, as opposed to trying to push it down into the soil from the top (it's too flimsy for that).
Here's a shot of the channel in progress. After I had dug and cleared a sufficient length, I pulled the fabric down taut into the channel and stapled into the slope. It's okay if it doesn't reach the very bottom.
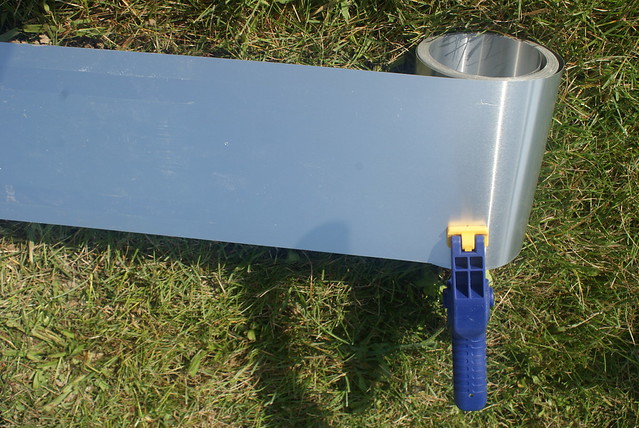
Then, CAREFULLY unroll your aluminum flashing. I can't emphasize enough how sharp the edges on this stuff are, or how important it is to wear real gloves when you're working with it.
I found that a spring clamp comes in handy if you want to unroll it in portions (it's a bit spring-loaded as it's packaged, and has a tendency to unwind quickly when unfastened).
Install the flashing in the channel. If you've done your digging straight enough and deep enough, this part should be easy. So now the channel should look like the diagram at right. The black is the landscape fabric, and the silver bit is the flashing.
Next, we want to fill the channel with pea gravel. This will be the structural bed on which our bricks will sit.
The trick here is to fill the channel to the point where the brick will stick up past the lip of the aluminum edging by at least 1/2". This will make sure that any foot traffic falls on the sturdy brick (not the flimsy aluminum) and will greatly reduce the chance of anybody getting cut on the metal. Once the bricks are installed and leveled, it should look like the diagram at right:
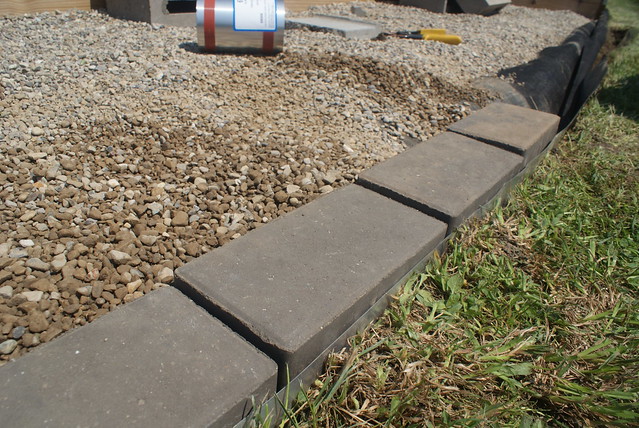
I continued this on around the edge of the garden... digging, clearing, stapling the fabric and placing the flashing, then filling with gravel and placing bricks. I found that it was helpful to carefully bend the flashing in towards the bricks above ground level... this helped minimize any potential gap between the brick edge and the flashing. If a brick is too low or high, you can level it by adjusting the amount of gravel underneath. After the bricks were in, I filled the garden bed walkways with gravel right up to the edge of the bricks.
We've got a lot of edging left to do, but I'm pretty comfortable with the process now, and now that I've got the hang of things, it's going pretty quickly. Here's a shot of the long curved edge at the end of the day. I'm pretty happy with how it looks, and I'm hoping that it will hold up, and that the ability to weed along the edge with the propane torch will be a real timesaver in the future. I'll update the blog as we continue to install the edging around our raised bed spaces. As always, we welcome feedback, comments, hints, suggestions, or dire warnings. Or, drop us a line if you found this helpful!

