Showing posts with label Farm Infrastructure. Show all posts
Tuesday, December 10, 2013
Concrete Day! (Update)
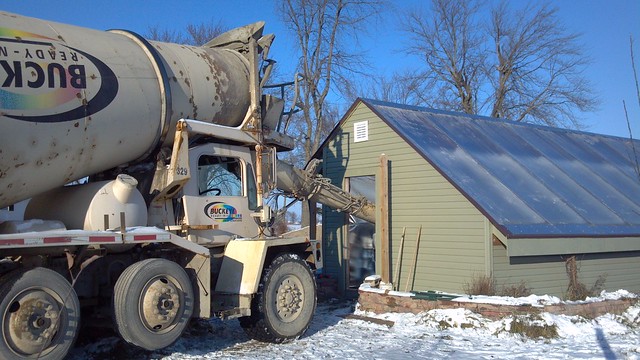
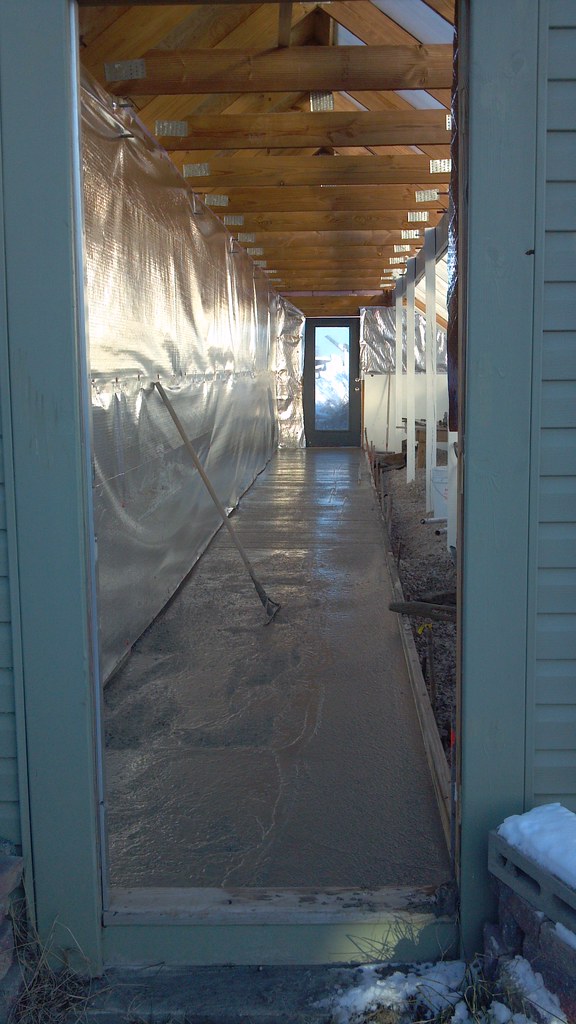
So the concrete appears to have gone in quite well. They got it in fast while the greenhouse was still relatively warm due to the aforementioned sunshine. Cure time is still a concern, as the sun went down a little after 5pm and the temperature dropped quickly afterwards... but it's all in and it looks pretty level.
I was worried about getting the truck around the back and side of the old white barn to where it could position the chute into the greenhouse door, but both the driver and Chris (my awesome neighbor who does concrete for a living) were total pros and it went off without a hitch. Big thanks to them for making this happen, and for doing it in the dead of winter.
With temperatures being where they are, it'll be a few days before it's good to walk on, and a few weeks before we can put any serious weight on there. That's fine, I'm just glad it's finally in!
Concrete day! Concrete day!
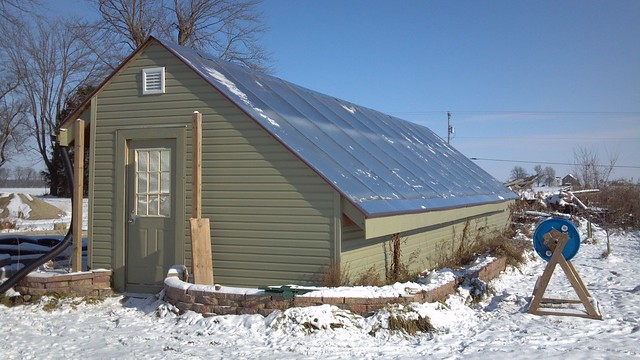
So we've got concrete scheduled to come and get poured in the greenhouse this afternoon (yes, in the middle of December in Ohio).
After several failed attempts previously due to scheduling and weather, this is kind of our last shot... as one of the two local concrete companies has already shut down for the season. I guess nobody likes pouring concrete when it's 20 degrees outside?
We need to get the concrete poured, as we can't get the barrels set up and filled in there without a solid and stable slab to put them on. No barrels, no water. No water, no heat retention... which also means no using the greenhouse until likely next fall... not a very happy proposition around here.
Fortunately, the sun decided to come out today, after a long stretch of dreary cloudiness. I cleaned the snow off the poly panels first thing this morning, and it should be heating up pretty good in there now.
I'm hoping it can catch and hold enough heat to give the concrete a chance to set up properly. Fingers crossed...
Wednesday, November 27, 2013
DIY Project: Scrapwood Sawbuck
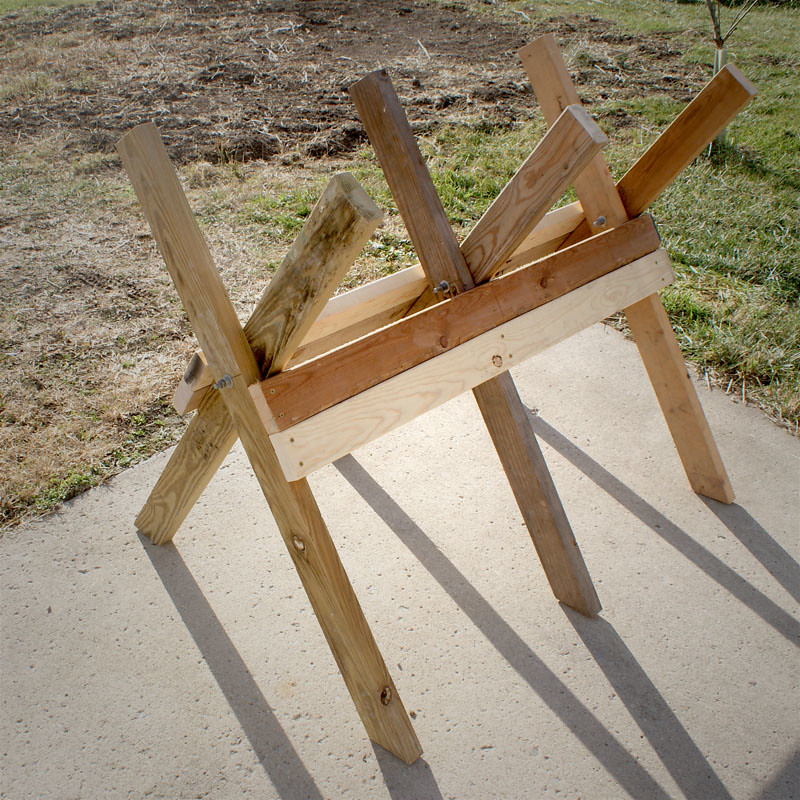
Put together a pretty solid little folding sawbuck today with a few dollars worth of hardware and some scrap 2x4s. Should make my next chainsaw session out in the woodshed a lot easier/safer.
Thinking of adding a few extra features to it, but we'll see how it works in basic form first.
Found the plans online, here.
Monday, August 12, 2013
DIY Farm Project: Lawn Edging with Aluminum Gutter Flashing
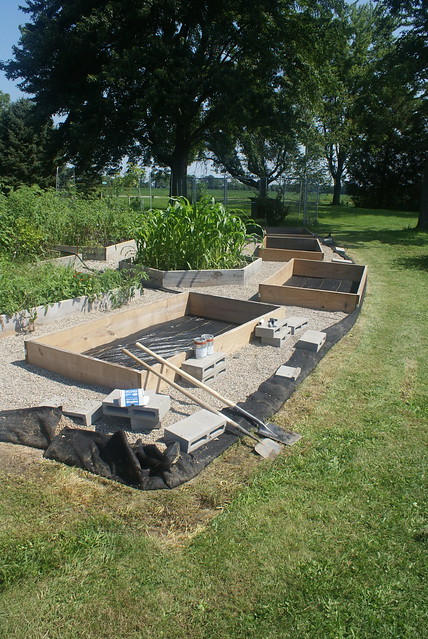
For the past few years we have spent significant time, energy and materials converting large areas of our overabundant lawnspace over to raised beds for annuals and herbs. Overall, this has been a success and a time-saver, but one of our biggest challenges has been dealing with the edge-space… where garden beds and grassy lawn meet. And our large numbers of beds mean we have a LOT of edge space to deal with.
We've tried a few different approaches, and learned some lessons the hard way. For example:
1. DO NOT have your raised beds directly against your lawn (i.e. no border between them). This is a recipe for a nightmare of upkeep, as the edge is difficult to keep trimmed and most types of grass are only too happy to send runners under the edge of your garden beds and into your garden soil. Nothing is more disheartening than carefully constructing raised beds, only to have them completely colonized by quack grass or Johnsongrass rhizomes within a year's time.
2. Grass and weeds are just as happy (and sometimes happier) growing on the topside of a landscape fabric/gravel combo as it was growing underneath it before you tried to destroy it by piling a bunch of heavy dark stuff on top of it. This arrangement certainly helps, but is no silver bullet.
In a fantasy dreamworld where money is no option, we'd simply purchase bulk quantities of fancypants milled aluminum edging material (which runs about $2.33/foot in it's basic, non-colored form BEFORE freight shpping), laughing while I light a cuban cigar with a burning fifty-dollar bill. Of course, then we'd probably also be paying other people to install it as well… also not happening.
In reality, we needed to devise a lawn edging "system" that met the following requirements:
- Non-degrading, non-toxic, lifetime-ish durability (i.e. not plastic)
- Equally capable of forming graceful curves and sharp edges
- Cheap and easily acquired.
- Relatively easy to prep/install without expensive specialized tools.
- Fireproof (so I can weed with our propane torch).
After a good amount of research, it looked like my material of choice was going to be aluminum gutter flashing. Looking online, I found a lot of instances of people discussing using aluminum gutter flashing as an edging material, but the few pictures I found looked like... well, they looked bad. I do believe there's something to this idea, and hoped that the results could be both practical and nice looking. So we're posting this up here to document how we decided to approach this project in the hope it might be helpful to others.
As with all our "How-To" segments from here at the farm (and most of the stuff we do), I must stress that this technique is essentially experimental. I am NOT saying that I know this is a time-tested method, or that I am an expert of any kind. I come up with stuff like this because I'm cheap and we prefer to DIY things around here whenever possible. If this ends up being a horrible catastrophe, I'll come back and update this with all the specific things I did wrong. That said... onward!
Materials:
- Landscape Fabric (I use DeWit Pro5 5oz weed barrier fabric because it is great).
- Lanscape Fabric staples
- Pea Gravel
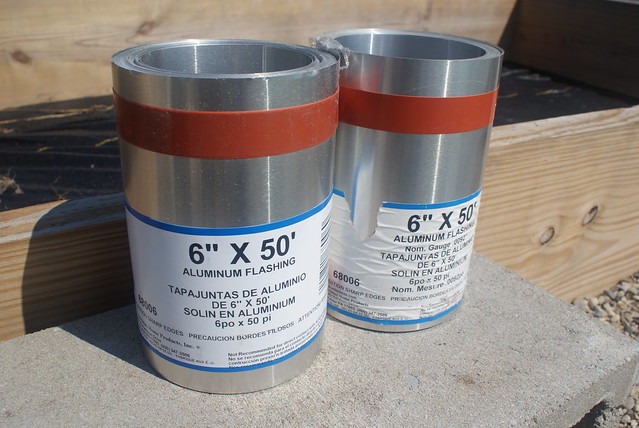
- 6" Aluminum flashing.
- Digging spade
- Power drill with 1/8" bit.
- Pop riveter
- GLOVES The flashing is very, very sharp. So sharp. Seriously, wear gloves.
- Thousands of bloodthirsty mosquitoes (not recommended, but we had them)
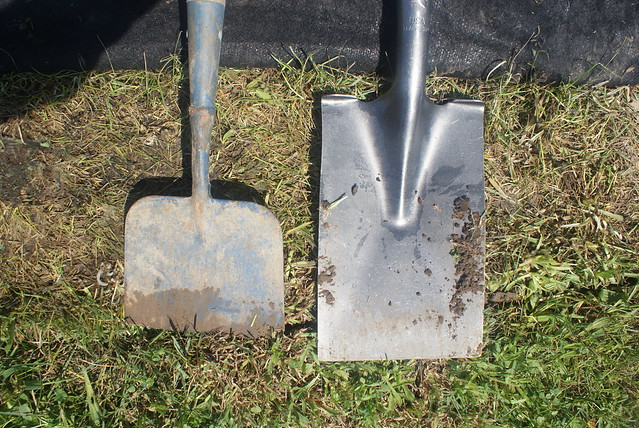
What I really wanted before starting this project was a nice, pre-sharpened spade, made of good steel with a metal handle. I'll get one eventually, but I was in a pinch this weekend (and the current home collection is mostly scoops and shovels) so I picked one up at Home Depot. I don't expect it to last a lifetime, exactly, but I'll get some good use out of it for what I paid for it.
I started out first thing Saturday morning by sharpening my new spade. Most tools you can buy at Home Depot/Lowes, etc. nowadays are not sharpened at all when you purchase them. I suspect many people think that digging chores are awful at least in part because they're doing it with a dull tool.
I just recently learned what a treat it is to work with a sharp shovel as opposed to a dull one, and as such I am making it a point (no pun intended) to keep my digging tools as sharp as possible from now on. [Link to a good How-To] Ten minutes on the porch with a metal file, and I had both my new shovel and my lawn edger tool with a nice new edge on them.
I started by peeling back and weighting in place the landscape fabric that I had installed last weekend. You can see where it was killing the grass. I then mowed the area on the lowest setting, making sure the grass clippings were flying away from (not into) the garden beds.
I began digging the edge line, straight down to a depth of about 5". This will eventually become the line at which I will install the flashing, and will be the visual break between the bricks and grass... so taking one's time and making sure the curves are smooth and the straight parts are straight is crucial. We didn't have too many straight parts in this part of the garden, otherwise I would have laid them out with some rebar spikes and mason line.
It's important to make sure this line is close enough to the landscape fabric. In most places I simply followed the curve of the edge of the fabric itself, and it turned out fine.
After you've done a decent length, you can go back with your spade and dig down diagonally from the garden side, to meet the vertical cut you just made. You're essentially cutting out a thin wedge of sod/turf.
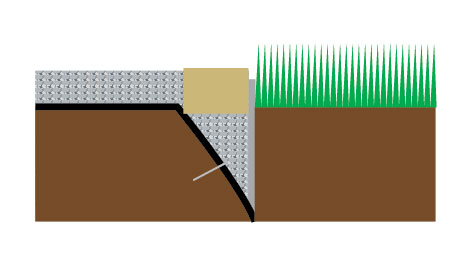
At this point it's a good idea to go through with a trenching shovel (if you have one) or a trowel and clean out all the loose dirt and debris out of the channel. Make sure the lawn side of the channel is as clean and straight/vertical as possible. From the side, you want it to look like this:

Keeping an even and sufficient depth of this channel is very important, as the flashing installs MUCH easier if you're simply dropping it in a channel that's deep enough, as opposed to trying to push it down into the soil from the top (it's too flimsy for that).
Here's a shot of the channel in progress. After I had dug and cleared a sufficient length, I pulled the fabric down taut into the channel and stapled into the slope. It's okay if it doesn't reach the very bottom.
Then, CAREFULLY unroll your aluminum flashing. I can't emphasize enough how sharp the edges on this stuff are, or how important it is to wear real gloves when you're working with it.
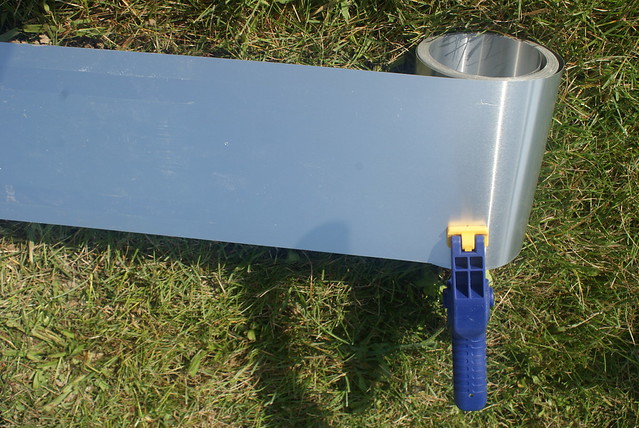
I found that a spring clamp comes in handy if you want to unroll it in portions (it's a bit spring-loaded as it's packaged, and has a tendency to unwind quickly when unfastened).
Install the flashing in the channel. If you've done your digging straight enough and deep enough, this part should be easy. So now the channel should look like the diagram at right. The black is the landscape fabric, and the silver bit is the flashing.
Next, we want to fill the channel with pea gravel. This will be the structural bed on which our bricks will sit.
The trick here is to fill the channel to the point where the brick will stick up past the lip of the aluminum edging by at least 1/2". This will make sure that any foot traffic falls on the sturdy brick (not the flimsy aluminum) and will greatly reduce the chance of anybody getting cut on the metal. Once the bricks are installed and leveled, it should look like the diagram at right:
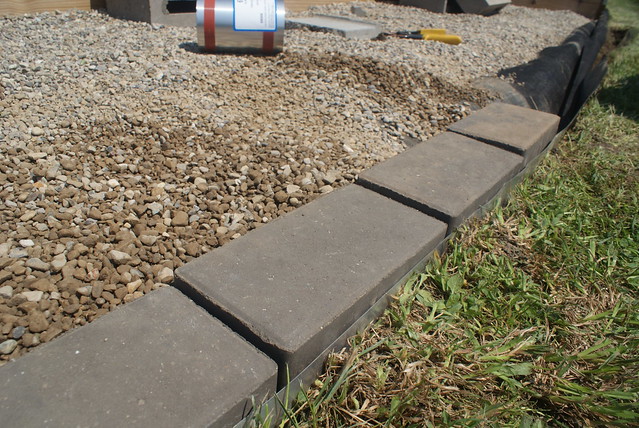
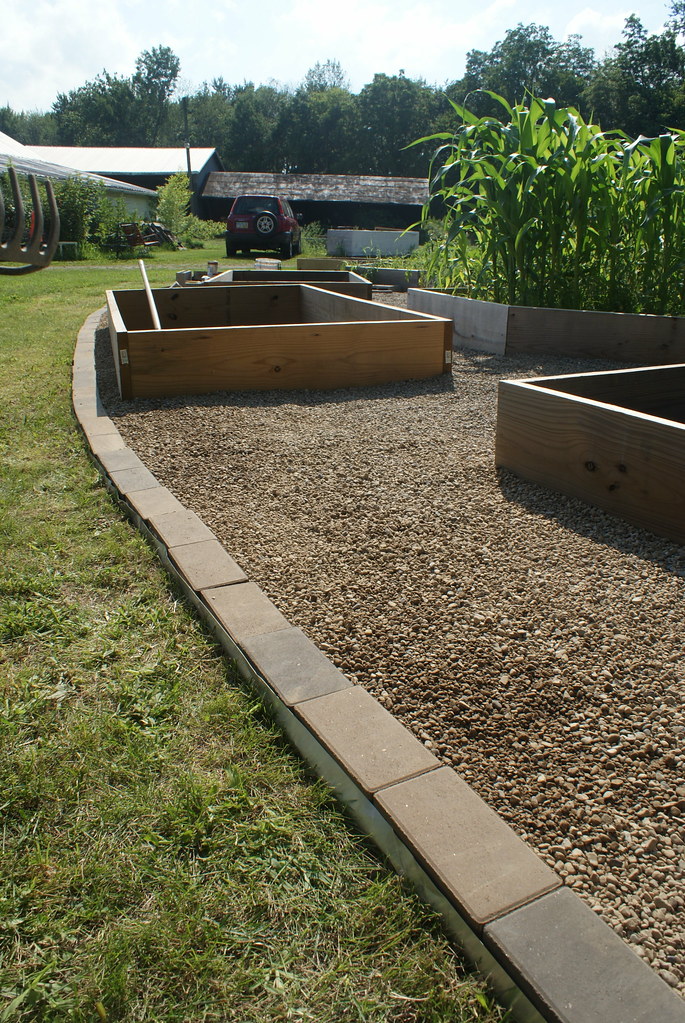
I continued this on around the edge of the garden... digging, clearing, stapling the fabric and placing the flashing, then filling with gravel and placing bricks. I found that it was helpful to carefully bend the flashing in towards the bricks above ground level... this helped minimize any potential gap between the brick edge and the flashing. If a brick is too low or high, you can level it by adjusting the amount of gravel underneath. After the bricks were in, I filled the garden bed walkways with gravel right up to the edge of the bricks.
We've got a lot of edging left to do, but I'm pretty comfortable with the process now, and now that I've got the hang of things, it's going pretty quickly. Here's a shot of the long curved edge at the end of the day. I'm pretty happy with how it looks, and I'm hoping that it will hold up, and that the ability to weed along the edge with the propane torch will be a real timesaver in the future. I'll update the blog as we continue to install the edging around our raised bed spaces. As always, we welcome feedback, comments, hints, suggestions, or dire warnings. Or, drop us a line if you found this helpful!
Sunday, May 5, 2013
Surgery recovery, loose ends, and Earth Tubes!
Over the last few weeks I've been focusing on some "loose ends" type projects around the farm while recovering from a minor surgery to repair an umbilical hernia. My strength, physical ability, and energy level are pretty much back up to where they were beforehand, but for a while there I was putting around on impulse power.
So this is going to be a long post, fair warning!
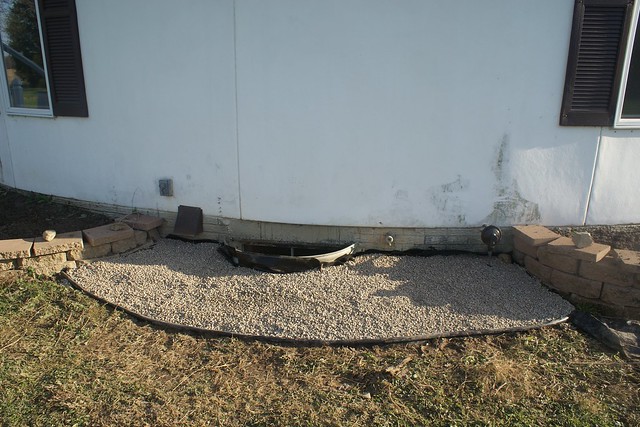
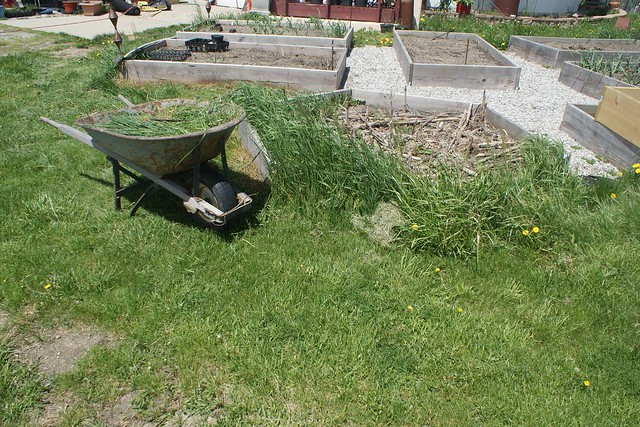
I spent the better part of a weekend a few weeks ago applying landscape fabric and pea gravel to the gap areas between sections of our circumn-housal (I totally just made that word up) raised beds. Due to their shape and location they are notoriously hard to mow/trim, and as a result these areas annually became a nightmare tangle of odd and menacing volunteer plants (with a common itchy thread of poison ivy woven throughout). So this year, while everything was still "down and brown" from winter, I decided to get proactive about it.
The results look pretty darn good, and will hopefully cut down on the amount of poison ivy we find trying to grow up the side of the house this fall (those would be the dark places along the house wall).
We spent a goodly amount of time last weekend working on the barn wreckage and putting up some more insulation panels in the greenhouse. We are approaching the time of year when it's really only comfortable in the greenhouse in the morning before the sun really gets going, and in the evening after it's gone down. So we'll be working in there on mornings and rainy days, and picking up whatever didn't get done in the fall. Hopefully we can get it 100% shored up inside for this winter, where we can do a real test of what will and won't grow in there during the icy months.
This weekend found us working to install the "earth tubes" passive ventilation system on the greenhouse. I had the idea for this while sealing up some small air leaks around the interior of the greenhouse, near the floor. I noticed that the greenhouse was pulling cool air in through these small airspaces, presumably as a result of the heated air being pushed out the two gable vents near the top of the side walls.
So I began planning for a system that would take better advantage of this tendency, in a way that would passively provide some measure of cool air flowing through the greenhouse during periods of warmer weather. It is essentially a set of two tubes that are buried beneath the entire earth mass of the raised bed along the shady north-facing side, and enter the greenhouse through the floor.
As convection pushes the hot air out the gable vents at the ends of the greenhouse, it should pull air through the tubes, cooling it as it passes beneath all the shaded soil (we may add a small solar-powered inline fan to increase draw through the tubes if needed).

In the winter we could limit or stop the air flow from within the greenhouse, to prevent pulling too much cold air in (buried no deeper than it is, the soil will be much less likely to provide any appreciable warming action on the cold air in winter).
I had never heard of Earth Tubes before, but in researching my newfound idea I learned that a similar system is frequently put into use in Earthships and other more holistically-designed homes.
In those circumstances, the systems are buried deep enough to provide cooling in the summer AND warming in the winter, but for our purposes we've got warming pretty much covered from the passive solar angle.
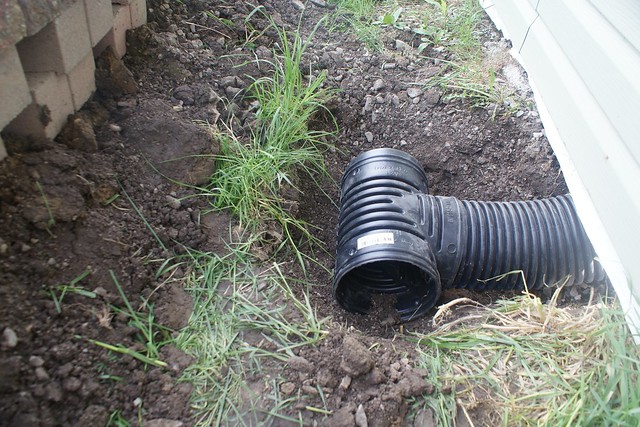
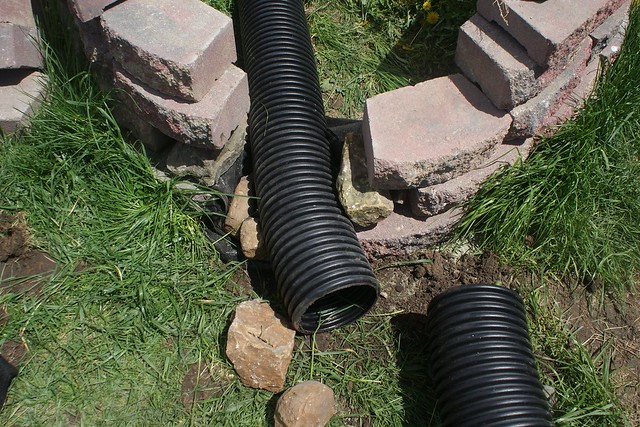
I'm still not sure to what extent it will work or how much air it will pull, but I'm pretty sure that it will provide some benefit, and it was relatively inexpensive to install (needing just a big-ass roll of HDPE drainage tubing, pictured above) and requires no major modifications to the greenhouse itself.
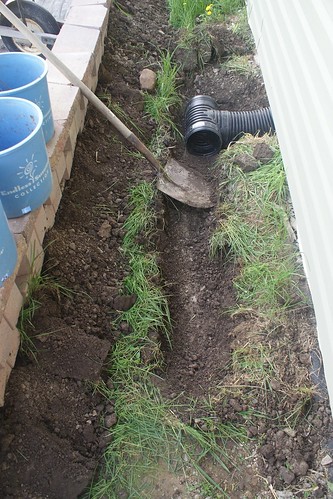
So I started digging! First, one of two holes that burrows just under the north wall of the greenhouse.
Here's the tube sticking up inside. Once we finish putting up the second layer of insulation and the radiant heat barrier, we'll trim the pipe off closer to the floor and affix it to the wall somehow.
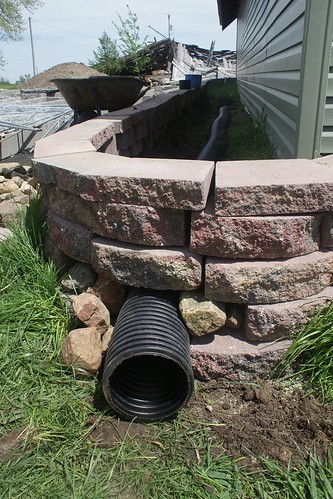
I kept digging a trench, slowly grading up from the low spot where the tube enters the building. By the time it met the farthest point of the raised bed, it needed to be at ground level to avoid taking in water during rains. I took down a few sections of the raised bed, and got the tube situated. I cut it off long, unsure of exactly how much tube I wanted sticking out. I can trim it later.
So this is going to be a long post, fair warning!
I spent the better part of a weekend a few weeks ago applying landscape fabric and pea gravel to the gap areas between sections of our circumn-housal (I totally just made that word up) raised beds. Due to their shape and location they are notoriously hard to mow/trim, and as a result these areas annually became a nightmare tangle of odd and menacing volunteer plants (with a common itchy thread of poison ivy woven throughout). So this year, while everything was still "down and brown" from winter, I decided to get proactive about it.
The results look pretty darn good, and will hopefully cut down on the amount of poison ivy we find trying to grow up the side of the house this fall (those would be the dark places along the house wall).
We spent a goodly amount of time last weekend working on the barn wreckage and putting up some more insulation panels in the greenhouse. We are approaching the time of year when it's really only comfortable in the greenhouse in the morning before the sun really gets going, and in the evening after it's gone down. So we'll be working in there on mornings and rainy days, and picking up whatever didn't get done in the fall. Hopefully we can get it 100% shored up inside for this winter, where we can do a real test of what will and won't grow in there during the icy months.
This weekend found us working to install the "earth tubes" passive ventilation system on the greenhouse. I had the idea for this while sealing up some small air leaks around the interior of the greenhouse, near the floor. I noticed that the greenhouse was pulling cool air in through these small airspaces, presumably as a result of the heated air being pushed out the two gable vents near the top of the side walls.
So I began planning for a system that would take better advantage of this tendency, in a way that would passively provide some measure of cool air flowing through the greenhouse during periods of warmer weather. It is essentially a set of two tubes that are buried beneath the entire earth mass of the raised bed along the shady north-facing side, and enter the greenhouse through the floor.
As convection pushes the hot air out the gable vents at the ends of the greenhouse, it should pull air through the tubes, cooling it as it passes beneath all the shaded soil (we may add a small solar-powered inline fan to increase draw through the tubes if needed).

In the winter we could limit or stop the air flow from within the greenhouse, to prevent pulling too much cold air in (buried no deeper than it is, the soil will be much less likely to provide any appreciable warming action on the cold air in winter).
I had never heard of Earth Tubes before, but in researching my newfound idea I learned that a similar system is frequently put into use in Earthships and other more holistically-designed homes.
In those circumstances, the systems are buried deep enough to provide cooling in the summer AND warming in the winter, but for our purposes we've got warming pretty much covered from the passive solar angle.
I'm still not sure to what extent it will work or how much air it will pull, but I'm pretty sure that it will provide some benefit, and it was relatively inexpensive to install (needing just a big-ass roll of HDPE drainage tubing, pictured above) and requires no major modifications to the greenhouse itself.
So I started digging! First, one of two holes that burrows just under the north wall of the greenhouse.
Here's the tube sticking up inside. Once we finish putting up the second layer of insulation and the radiant heat barrier, we'll trim the pipe off closer to the floor and affix it to the wall somehow.
Some creative stone work to fill in some gaps and some retaining wall re-assembly, and we had ourselves an installed tube! I need to find or fabricate some form of grate cap for the end to keep my new air tube from becoming a high-traffic tunnel for critters (especially in the colder months when a warm building is oh-so enticing).
I am encouraged thus far, as the building is sucking air in through the hole around the tube at a noticeable rate. I'm hoping it will do the same through the tubes once I get that hole back-filled and sealed.
I also thought it would be a good time to dig the post-holes on either end of the west-facing door that will serve as the structural supports for our forthcoming trellis/pergola/awning thing (I didn't want to have to dig the dirt back out of the beds once I'd filled it in).
The trellis/pergola/awning thing will not only look neat and provide some shade over the west doorway, but will also provide a venue for climbing vining plants like grapes or wisteria. It will also give me something solid to latch the door to when it's open so it's not blowing shut all the cussing time.
Spent the rest of the day preparing to extend our annual raised bed area, chopping back quack grass from around (and unfortunately, within) some of our beds who have a side that touches lawn. Important lesson here when it comes to raised beds.... always make sure you have a border of grass-suppressant (lanscape fabric, gravel, something) all the way around your beds... otherwise the grass will just hop under the bed walls and go to town in the soil inside. If I had a dollar for every worming little white root I fished out of the dirt today... ugh.
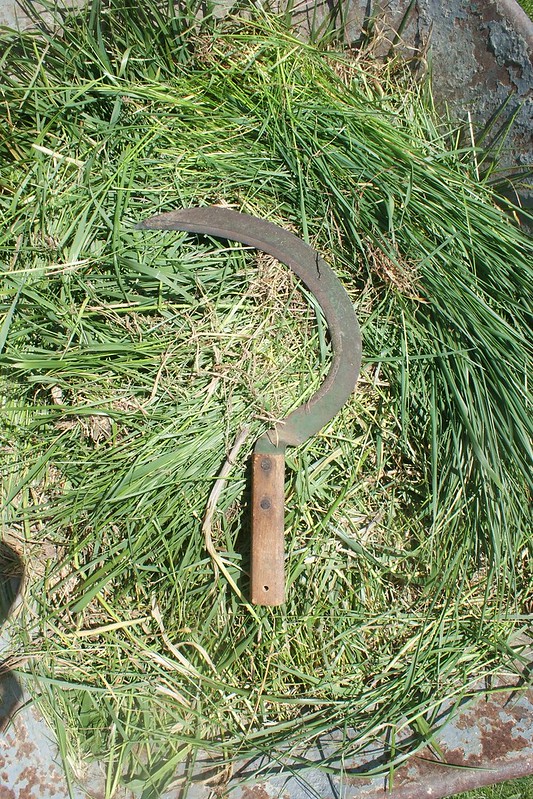
This did mean that I got to make some good use of my new hand sickle today... old but practically brand new, I picked it up at the local flea market for $2.50. Sharp enough to dig deep into the wood of the raised bed when I miscalculated my swing. Vanquished a lot of grass out today with that thing....
Saturday, April 13, 2013
Chestnut orchard layout, even more raised beds, and accidental garlic...
After coffee and a few pieces of Leah's excellent banana bread, I pulled on my muck boots and waded out into our very skooshy farm. We've had significant amounts of rain over the past few days (finally!) and the soil in the field is pretty waterlogged.
I drove some T-posts to mark out the locations of soon-to-be-planted trees, along the better-drained and less consistently marshy eastern edge of our fallow field. This year I'll be putting in between ten and twenty blight-resistant chestnut trees (about five different varieties), interplanted with black locust seedlings. The goal is to begin converting this portion of our field towards a more productive and diverse forest area that will one day provide us with food and timber.
All the plants in the area are loving the moisture and have seemingly sprung to life overnight. The grass which looked patchy and very dormant as recently as a week ago now looks like it might need mowing soon (ugh).
We've been reading Gene Logsdon's Living at Nature's Pace: Farming and the American Dream this month for our Meetup group's book club, and it's got me reminding myself of the importance of being constantly aware of and an expert on one's own place, down to every seemingly mundane detail.
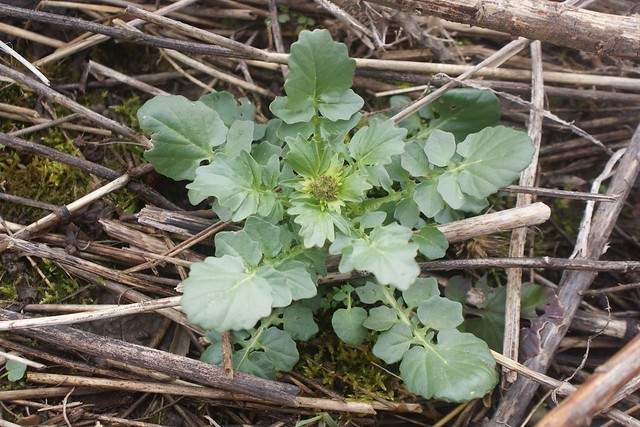
So amongst the moss and wet and mouldering remnants of last year's growth (and the ever more ubiquitous spiked rosettes of teasel), I spotted a few plants I was unfamiliar with:
After some research, I'm pretty sure this is some kind of cress. The closest ID I could find was Early Winter Cress, but I'm still not 100% sure. I'd like to be sure before I try nibbling on it. But I want to. Because I love cress.
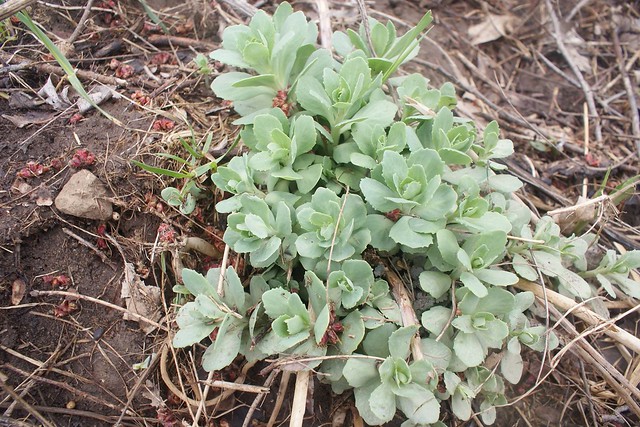
Leah also noticed some type of volunteer sedum growing down by the swale on one of the piles where I've dumped potentially live plant material that I didn't want gaining a foothold in our compost piles. We've found some similar looking plants on Google image search, but are also finding them identified (potentially mis-identified) as various different species of sedum.
We're discussing rescuing it from the unruly riot that is our woods edge down by the swale and giving it a more dignified home in a pot up near the house. It certainly is lovely looking.
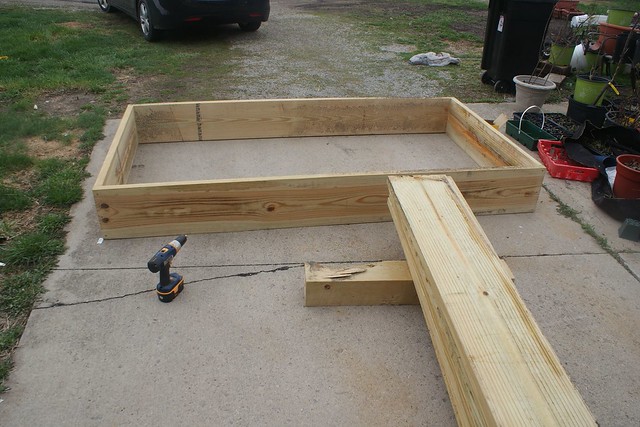
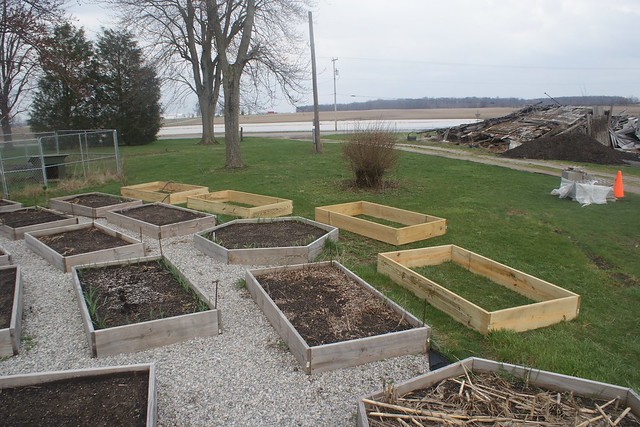
We've been planning to expand our existing Zone 1 raised bed area that we use for more intensive cultivation of annuals along the southeast side of the house. We've had the lumber sitting around for a while, but I just got around to drilling and screwing the beds together today.
I assembled four 4'x8'x12" beds, and Leah and I tried some different placements to see what looked best. We're gonna let them sit for a bit and see how it looks from different angles before we extend the fabric/gravel and formally install them.
If you look closely in the picture above, you can see little sprigs of green around the interior edge of our raised beds... that's our garlic, dutifully performing it's duties as one of spring's tastiest ephemerals.
Speaking of garlic, we've had some garlic bulbs that we missed in last fall's "hasty harvest" sprout up bunches of greens at the same time as their more fastidiously harvested/stored/replanted brethren, and this has me thinking....
Leah reminded me that some people just leave the garlic in the soil year-round rather than harvesting it in summer and then replanting later in fall. I'm not sure what the advantages/disadvantages to this method, but I carefully dug up, separated and replanted our "forgotten" shoots at wider intervals. We'll see how they fare in relation to the cloves we planted in the fall. A garlic experiment! For science!
I drove some T-posts to mark out the locations of soon-to-be-planted trees, along the better-drained and less consistently marshy eastern edge of our fallow field. This year I'll be putting in between ten and twenty blight-resistant chestnut trees (about five different varieties), interplanted with black locust seedlings. The goal is to begin converting this portion of our field towards a more productive and diverse forest area that will one day provide us with food and timber.
All the plants in the area are loving the moisture and have seemingly sprung to life overnight. The grass which looked patchy and very dormant as recently as a week ago now looks like it might need mowing soon (ugh).
We've been reading Gene Logsdon's Living at Nature's Pace: Farming and the American Dream this month for our Meetup group's book club, and it's got me reminding myself of the importance of being constantly aware of and an expert on one's own place, down to every seemingly mundane detail.
So amongst the moss and wet and mouldering remnants of last year's growth (and the ever more ubiquitous spiked rosettes of teasel), I spotted a few plants I was unfamiliar with:
After some research, I'm pretty sure this is some kind of cress. The closest ID I could find was Early Winter Cress, but I'm still not 100% sure. I'd like to be sure before I try nibbling on it. But I want to. Because I love cress.
Leah also noticed some type of volunteer sedum growing down by the swale on one of the piles where I've dumped potentially live plant material that I didn't want gaining a foothold in our compost piles. We've found some similar looking plants on Google image search, but are also finding them identified (potentially mis-identified) as various different species of sedum.
We're discussing rescuing it from the unruly riot that is our woods edge down by the swale and giving it a more dignified home in a pot up near the house. It certainly is lovely looking.
We've been planning to expand our existing Zone 1 raised bed area that we use for more intensive cultivation of annuals along the southeast side of the house. We've had the lumber sitting around for a while, but I just got around to drilling and screwing the beds together today.
I assembled four 4'x8'x12" beds, and Leah and I tried some different placements to see what looked best. We're gonna let them sit for a bit and see how it looks from different angles before we extend the fabric/gravel and formally install them.
If you look closely in the picture above, you can see little sprigs of green around the interior edge of our raised beds... that's our garlic, dutifully performing it's duties as one of spring's tastiest ephemerals.
Speaking of garlic, we've had some garlic bulbs that we missed in last fall's "hasty harvest" sprout up bunches of greens at the same time as their more fastidiously harvested/stored/replanted brethren, and this has me thinking....
Leah reminded me that some people just leave the garlic in the soil year-round rather than harvesting it in summer and then replanting later in fall. I'm not sure what the advantages/disadvantages to this method, but I carefully dug up, separated and replanted our "forgotten" shoots at wider intervals. We'll see how they fare in relation to the cloves we planted in the fall. A garlic experiment! For science!
Sunday, April 7, 2013
Here Comes the Dirt!
We had the benefit of some beautiful, truly spring-like weather this weekend, and tried hard to utilize it.
I spent saturday doing mostly cleanup work... removing an old flower barrel out by the road, leveling out some old flowerbeds and relocating some poorly planned tree/shrub plantings that annually became weedy eyesores and made mowing (even) more difficult. I even spread some grass seed in the disturbed areas (but oh, how it pains me to actively plant the cursed stuff). The overall effect will be to smooth out and clean up the look of the frontage quite a bit, and make mowing the area more efficient.
We had 20 cubic yards of soil delivered on Saturday morning, and thankfully the driver was able to land it right next to/kinda on-top-of the beds we'll be filling. As I've learned, the less long-distance trips you have to make in the sun with a wheelbarrow full of soil, the better.
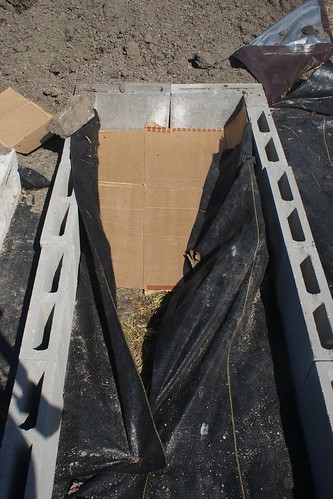
The landscaping fabric hasn't been down long enough to fully kill the grass, so for the beds that we're filling/planting first, I'm laying down cardboard under the soil to finish off the turf.
We cut and pulled back the landscaping fabric, laid the cardboard, and filled the beds with soil. Once the cardboard deteriorates, the soil in the beds will be in direct contact with the soil beneath.
We planted our first direct-seeded crops tonight as well, seeding one of the two beds we filled... a double row of Sugar Sprint snap peas, two rows of German Giant radishes, and a row of turnips.
We took a break for a few hours out to go take Heidi on a walk around the park in Richwood, and got some ice cream. We also scored some more cardboard from the recycle-dumpster in town.
At the rate we're going, a few more solid work days and we should have the new garden beds filled and planted.
Sunday, March 24, 2013
Revising the Long Beds (Day 3) and Misc. Sunday Work
Bleary weather returned today, blech. But we started off our Sunday the best way we know how... by going to an all-you-can-eat pancake breakfast! Our local (just down the road on the way into town) Fire Department was having one as a fundraiser, with the pancakes made by Chris Cakes (he throws them to/at you). Also ran into our ex-next door neighbors. He's a volunteer firefighter there and they're awesome folks.
While we ate, we game-planned an idea Leah had come up with regarding a potential alteration to the long bed plan... namely that of opening an aisle down the middle of the rows, in effect making 8 rows instead of 4. We discussed the addition of some sort of arched trellis or pergola over the gap between rows to create a nice focus for the garden area and better access to the beds. We agreed that this was a good idea.
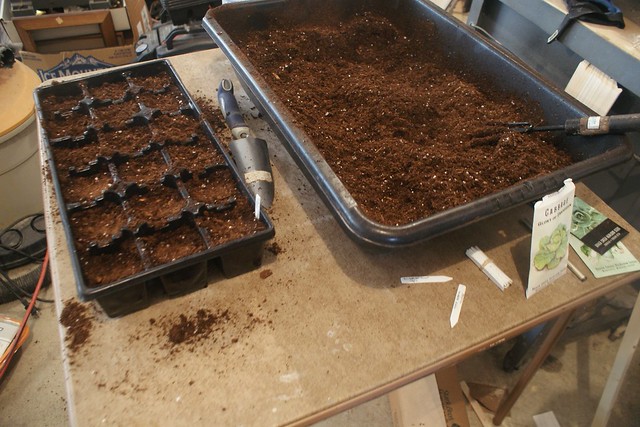
Wanting to keep on-schedule with our garden this year (which might actually be possible without the greenhouse construction hanging over our heads), we also started our first seeds indoors today.
We seeded cabbage, collards and leeks, and set them up under some grow lights in the garage where temperatures will hopefully be in the correct range for them to germinate.
I went out and made quick work of making our aisle down the middle of our long beds.
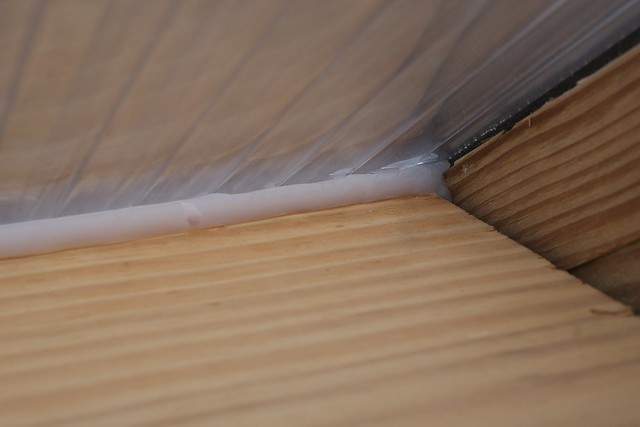
Also did some more weather sealing in the greenhouse... filling more gaps with Great Stuff and sealing the areas where the polycarbonate panels meet our windowsills with silicone caulk. Due to the extreme angle produced by the sill and panel, I had to modify each caulk tube by taping a piece of tubing to extend the nozzle. This worked like a charm to get the caulk where it needed to go, but unfortunately it meant I couldn't use my Ryobi 18v Power Caulker (one of the best tools ever... I'll do a post one day on how awesome it is) and now my wrists are busted. But my greenhouse is more airtight than it used to be!
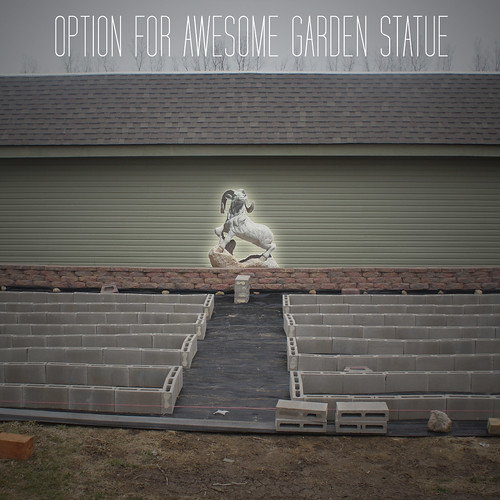
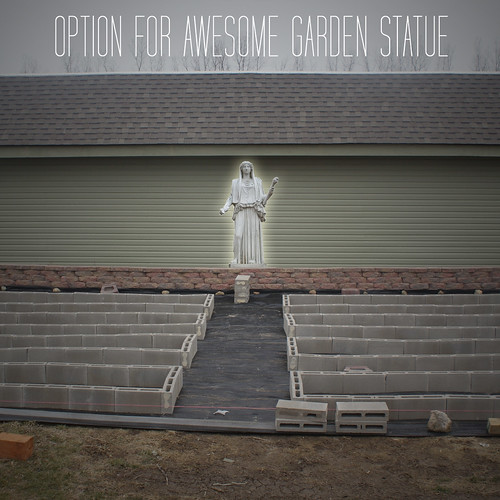
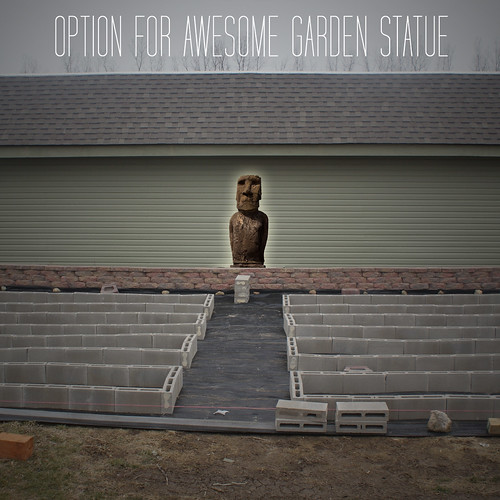
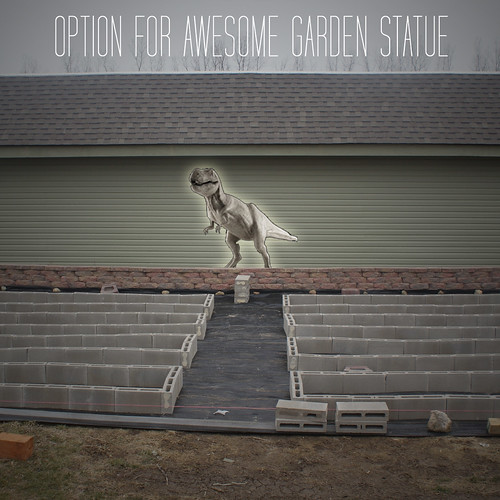
Leah and I also discussed adding a visual feature in the raised bed along the greenhouse where our new aisle ends. We both think this could be really awesome. I've done a little photoshopping below to illustrate a few examples of how awesome this could be, exactly. My favorite is the last one, for obvious reasons.
While we ate, we game-planned an idea Leah had come up with regarding a potential alteration to the long bed plan... namely that of opening an aisle down the middle of the rows, in effect making 8 rows instead of 4. We discussed the addition of some sort of arched trellis or pergola over the gap between rows to create a nice focus for the garden area and better access to the beds. We agreed that this was a good idea.
Wanting to keep on-schedule with our garden this year (which might actually be possible without the greenhouse construction hanging over our heads), we also started our first seeds indoors today.
We seeded cabbage, collards and leeks, and set them up under some grow lights in the garage where temperatures will hopefully be in the correct range for them to germinate.
I went out and made quick work of making our aisle down the middle of our long beds.
Also did some more weather sealing in the greenhouse... filling more gaps with Great Stuff and sealing the areas where the polycarbonate panels meet our windowsills with silicone caulk. Due to the extreme angle produced by the sill and panel, I had to modify each caulk tube by taping a piece of tubing to extend the nozzle. This worked like a charm to get the caulk where it needed to go, but unfortunately it meant I couldn't use my Ryobi 18v Power Caulker (one of the best tools ever... I'll do a post one day on how awesome it is) and now my wrists are busted. But my greenhouse is more airtight than it used to be!
Leah and I also discussed adding a visual feature in the raised bed along the greenhouse where our new aisle ends. We both think this could be really awesome. I've done a little photoshopping below to illustrate a few examples of how awesome this could be, exactly. My favorite is the last one, for obvious reasons.
Saturday, March 23, 2013
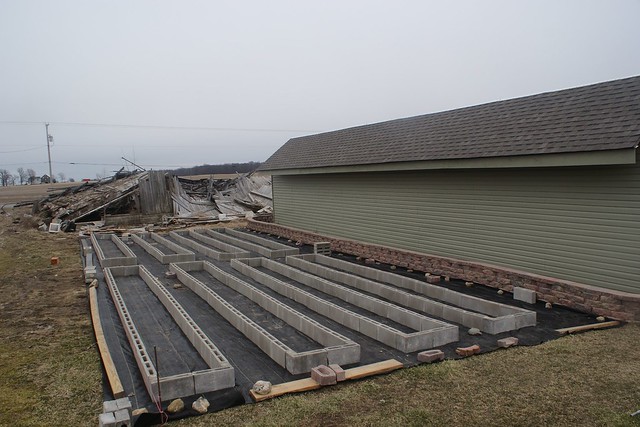
Building the Long Beds, Day 2
The weather held out for us today, and it was a gorgeous day to be outside. The redwing blackbirds on the property are in rare form, and were up with me and the sunrise, perching amidst the buds in our maples and making their twitter-screeches en-masse.
We got out early and got working. Last week served us well as practice to hone our technique, and we hit our stride early. The rows went down a lot more quickly this weekend than they did last Sunday. I think the weather helped a lot... it was a lot more pleasant to be outside today.
We had run out of landscaping fabric last Sunday, and so we also needed to extend our area of coverage to get the full four beds installed. Fortunately, the wind kept to a minimum.
Around 2pm, we heard a plane in the sky, and saw it coming towards us flying low. I had a sneaking suspicion that it might actually be friends of ours... my coworker Meg and her boyfriend Grant like to take his plane up on the weekends, and I knew they had tried to fly over the farm before. Sure enough, the plane banked around and circled the farm several times.
We waved a lot. It was pretty neat. We've never had friends visit us in a plane before. Meg was even nice enough to snap us some aerial shots of the farm!
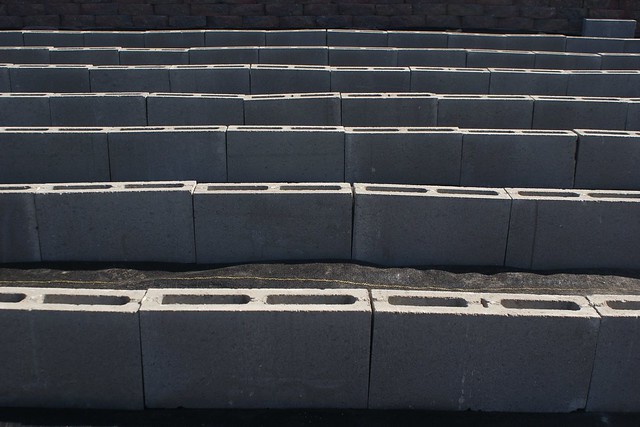
We kept working, and working, and working. Soon all the blocks seemed to blur together... at some point we had lunch. At some other point Leah went inside and took a nap. At some point I finished the fourth row, and voila! We're ready to add soil and gravel.
Monday, March 18, 2013
Building the Long Beds, Day 1
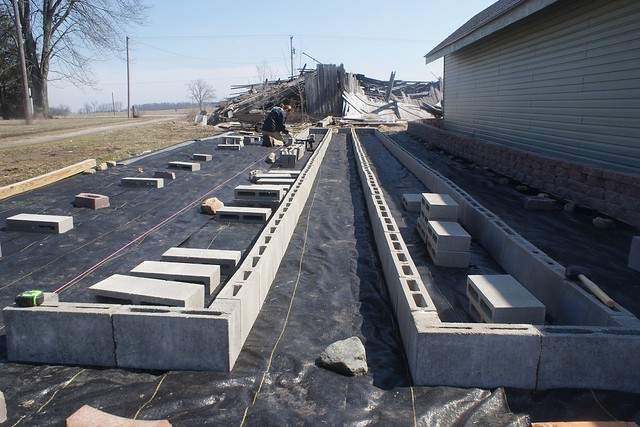
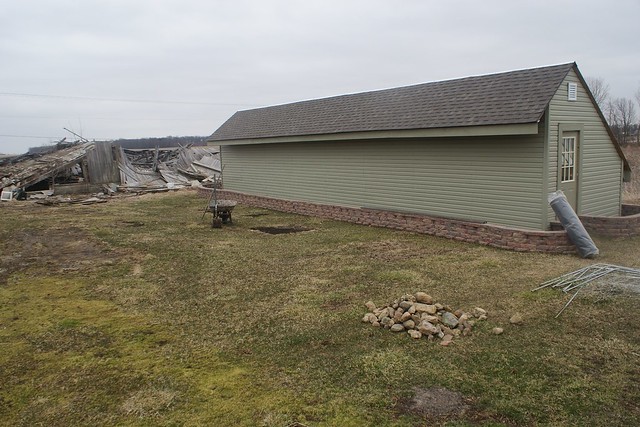
Despite soggy ground, overcast skies and temps in the mid to high thirties, Leah and I bundled up in layers of work clothes and headed outside Sunday to lay the groundwork for what will become a series of long concrete raised beds that will run parallel to the greenhouse on it's North side.
Situated as such, anything planted there should have some decent protection from the wind (even moreso with the potential addition of a hedge running perpendicular to the beds and greenhouse on their East side... still considering that one).
The first step was a barest-bones attempt at leveling the area by filling in the most obvious holes, year-old tire ruts and low spots with topsoil. The area as a whole still slants noticably, but at least we wouldn't be turning an ankle stepping in any holes.
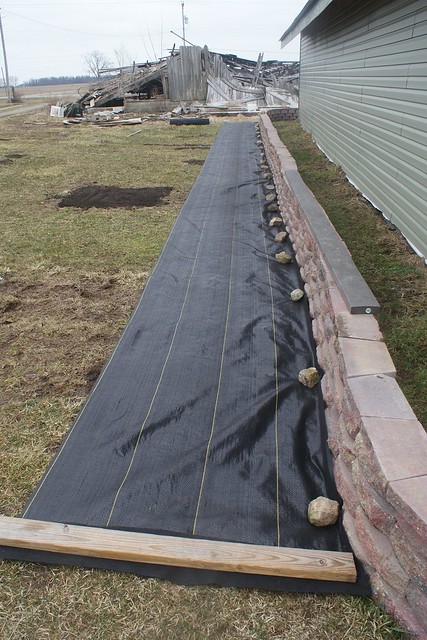
Better planning would have seen us waiting to install the landscaping-block wall around the north side of the greenhouse (visible above) until after we laid the landscaping fabric, so the edge of the fabric could tuck under the wall and provide a most effective barrier against weed growth. Suffice to say, this did not happen, and we were left with the somewhat less desirable (but waaaay more fun) option of blasting all the weeds along the north concrete wall with my big propane torch.
The weather was perfect for this part, at least (cold and wet) and I managed to accomplish it without setting fire to anything important... I think.

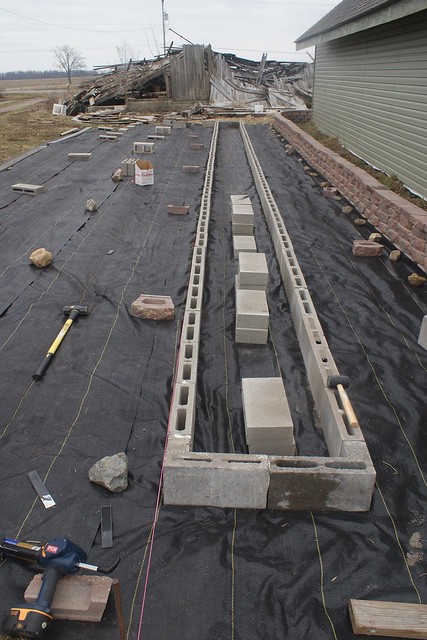
Next we laid and weighted down the landscaping fabric, heavy-duty 5-mil stuff from DeWitt. We've used this before, under the gravel around our other raised beds and in the greenhouse. It's good strong stuff.
I miscalculated how much we'd need, and we ran out before covering the desired area-to-convert in full. We weighed the rest of it down with some rocks, scrap lumber and cinder blocks (it gets pretty windy in our neck of the woods, and I didn't want to end up chasing this stuff across a muddy field).
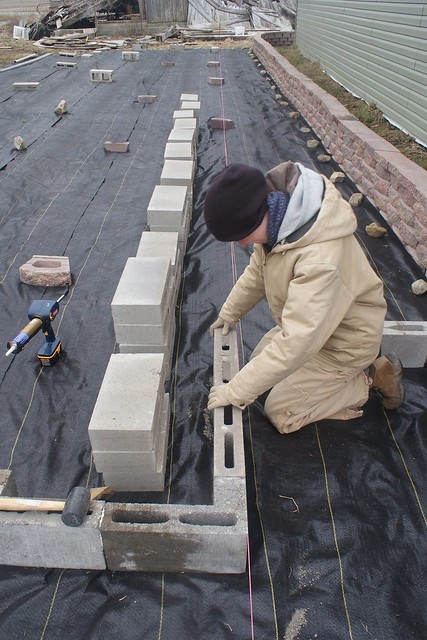
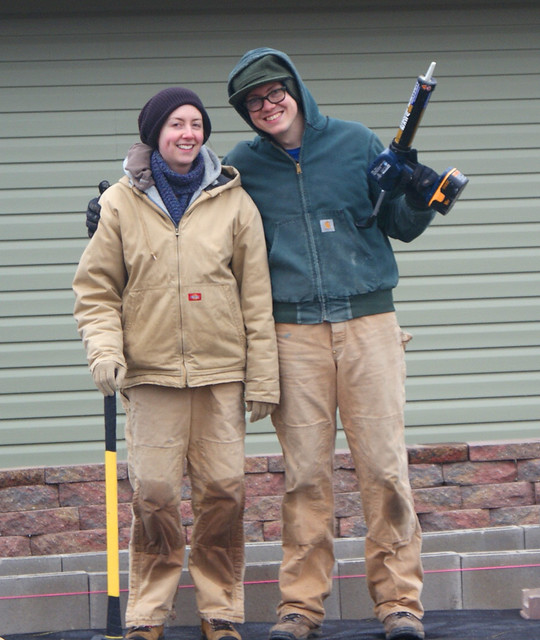
We took some measurements, pulled a taut mason line across the expanse of black fabric, and began laying the first bed. I hauled blocks and caulked the edges while Leah placed and leveled the blocks.
We managed to get one entire bed done... well more than I thought we'd be likely to accomplish in one day. We ended the day tired, somewhat cold and wet, and pretty darn sore (though that was mostly me... Leah is apparently tougher than I am when it comes to a day of working with cinder blocks...)

Once we get them built, our goal is to use these beds to efficiently grow row-type crops (peas, beans, etc.) in a way that allows us a decent amount come harvest-time (one eight foot row of pea or bean plants doesn't yield much), while simultaneously giving us some more raised bed space that we can use to interplant other annuals or herbs alongside the main row crop.

Situated as such, anything planted there should have some decent protection from the wind (even moreso with the potential addition of a hedge running perpendicular to the beds and greenhouse on their East side... still considering that one).
The first step was a barest-bones attempt at leveling the area by filling in the most obvious holes, year-old tire ruts and low spots with topsoil. The area as a whole still slants noticably, but at least we wouldn't be turning an ankle stepping in any holes.
Better planning would have seen us waiting to install the landscaping-block wall around the north side of the greenhouse (visible above) until after we laid the landscaping fabric, so the edge of the fabric could tuck under the wall and provide a most effective barrier against weed growth. Suffice to say, this did not happen, and we were left with the somewhat less desirable (but waaaay more fun) option of blasting all the weeds along the north concrete wall with my big propane torch.
The weather was perfect for this part, at least (cold and wet) and I managed to accomplish it without setting fire to anything important... I think.

Next we laid and weighted down the landscaping fabric, heavy-duty 5-mil stuff from DeWitt. We've used this before, under the gravel around our other raised beds and in the greenhouse. It's good strong stuff.
I miscalculated how much we'd need, and we ran out before covering the desired area-to-convert in full. We weighed the rest of it down with some rocks, scrap lumber and cinder blocks (it gets pretty windy in our neck of the woods, and I didn't want to end up chasing this stuff across a muddy field).
We took some measurements, pulled a taut mason line across the expanse of black fabric, and began laying the first bed. I hauled blocks and caulked the edges while Leah placed and leveled the blocks.
We managed to get one entire bed done... well more than I thought we'd be likely to accomplish in one day. We ended the day tired, somewhat cold and wet, and pretty darn sore (though that was mostly me... Leah is apparently tougher than I am when it comes to a day of working with cinder blocks...)

Once we get them built, our goal is to use these beds to efficiently grow row-type crops (peas, beans, etc.) in a way that allows us a decent amount come harvest-time (one eight foot row of pea or bean plants doesn't yield much), while simultaneously giving us some more raised bed space that we can use to interplant other annuals or herbs alongside the main row crop.

Subscribe to:
Posts (Atom)