Aaaaaaaand we haven't posted anything since winter.
It's the old homestead blogging paradox... the more awesome stuff you do that you should be blogging about, the less time and energy you have left over to do so.
Good news is, we're in the process of setting up a brand-spankin' new website that should be easier to keep up with (and also has some neat features like being fully tablet/mobile friendly).
It's still very much a work in progress, but if you're one of the people actually reading this, I figure you deserve a sneak peek.
Check out the new site at sixroosters.com
Please update your bookmarks/RSS feeds/etc, and we'd love to hear any feedback about the new site. See you all over at the new place!

Wednesday, August 6, 2014
Friday, February 7, 2014
Thursday, February 6, 2014
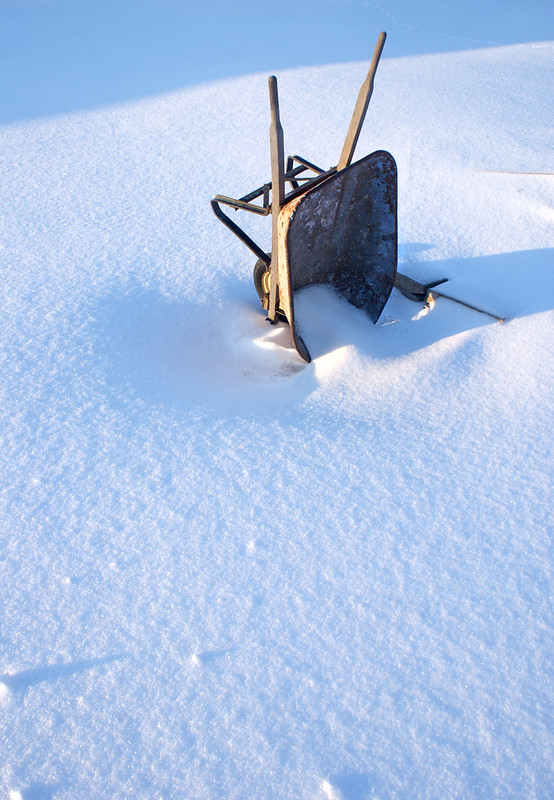
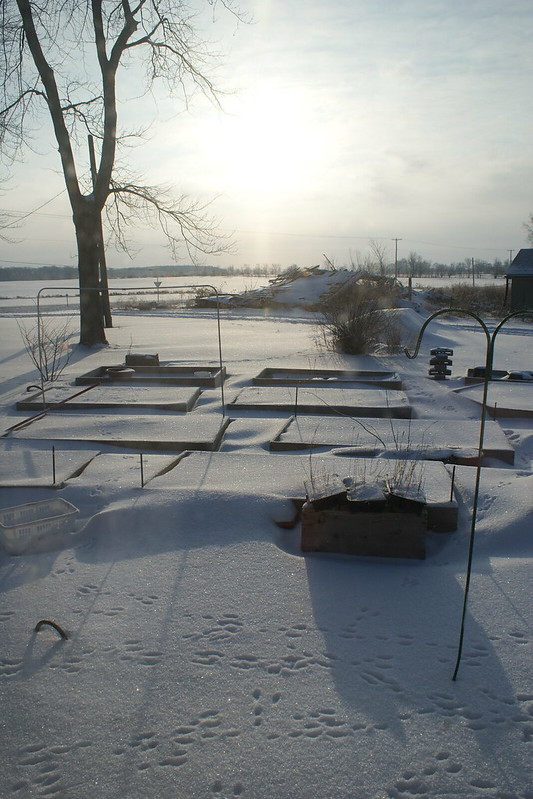
Winter morning on the farm...
I know that it's the time of year where it's become acceptable (and even fashionable) to gripe on constantly about the winter weather. Gone is the shock and mild outrage of early winter (Gosh! How cold it is out there!), replaced instead with the sort of salty resignation (I'm ready for Spring now).
And I feel that. Really, I do. I'm totally ready for flower buds and warmer temps and ephemeral growth and baby everythings flopping about through nature's new flush of spring. But sometimes winter can surprise you, and present you with moments of epic beauty that are impossible at other times.
So it was this morning when I was bumping around in the kitchen just after sunrise. The sun was glittering off the freshly blown snow, rabbit tracks were everywhere (as always), and snow was falling so slowly through the morning light I felt like I was witnessing some sort of cheesy slo-mo treatment from an indie film. Quite lovely. I even tried to get all that beauty crammed into a camera (I only caught some), and in that brief moment I was thankful for winter, despite the inconveniences it brings.
So it was this morning when I was bumping around in the kitchen just after sunrise. The sun was glittering off the freshly blown snow, rabbit tracks were everywhere (as always), and snow was falling so slowly through the morning light I felt like I was witnessing some sort of cheesy slo-mo treatment from an indie film. Quite lovely. I even tried to get all that beauty crammed into a camera (I only caught some), and in that brief moment I was thankful for winter, despite the inconveniences it brings.
Sunday, January 26, 2014
Baking Away Winter...

By this time of year, with the temperatures once again vortexing themselves down around zero degrees and the snow drift slowly overtaking the tops of the raised beds, being stuck at home is starting to wear on me. Being unemployed all winter certainly doesn't help.
I know it's getting bad when I start getting really excited to perform any small, mundane task or errand that involves leaving the house. Are we out of something? Even if we don't really need that thing right now and probably won't for a while, anyways? Nevermind, I'd better go pick some up, just in case. I even savor the act of trudging out through the snow to pick up the mail by the road.
So over the past few days I've taken a new lean and dusted off the oven mitts (seriously, I need to wash those) and gotten back to some baking. In addition to keeping me generally occupied, it has the added benefit of keeping the kitchen warm and the house smelling good.
Last night I did a few loaves of from-scratch banana bread, and tonight I knocked out a pretty excellent batch of chocolate chip cookies. So tonight, while the wind howls around outside, I'll be putting myself to bed with a few chocolate chip cookies and a tall frosty glass of milk... stout. The tasty stuff from Left Hand Brewing Co. Even better than the white stuff, I swear.
Tuesday, December 10, 2013
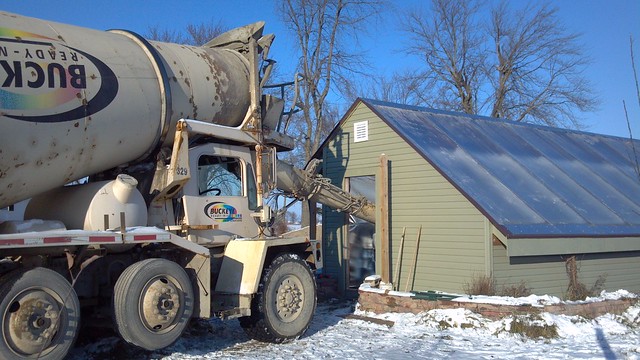
Concrete Day! (Update)

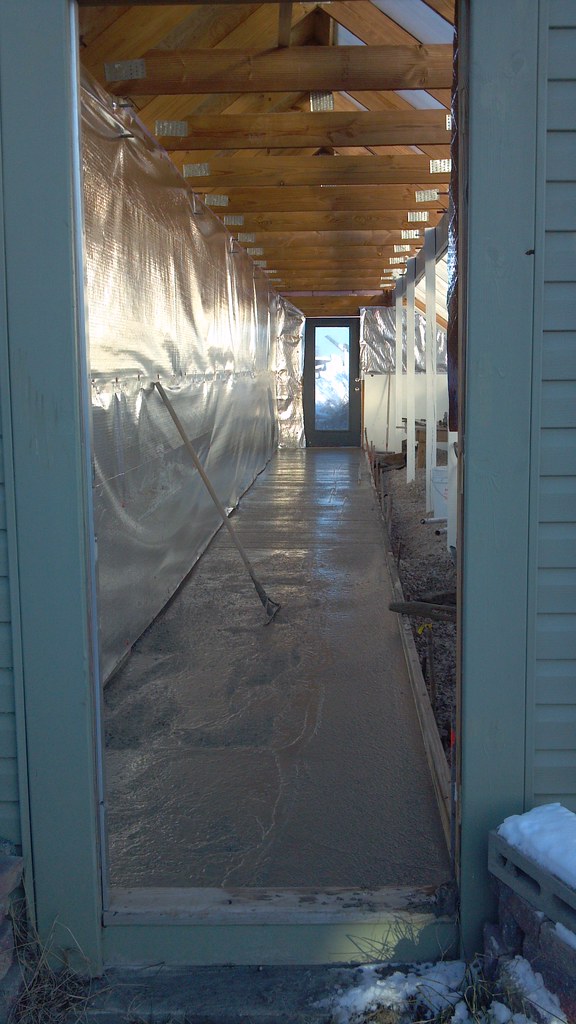
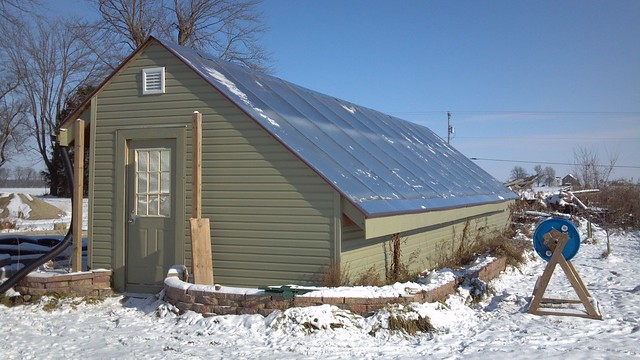
So the concrete appears to have gone in quite well. They got it in fast while the greenhouse was still relatively warm due to the aforementioned sunshine. Cure time is still a concern, as the sun went down a little after 5pm and the temperature dropped quickly afterwards... but it's all in and it looks pretty level.

I was worried about getting the truck around the back and side of the old white barn to where it could position the chute into the greenhouse door, but both the driver and Chris (my awesome neighbor who does concrete for a living) were total pros and it went off without a hitch. Big thanks to them for making this happen, and for doing it in the dead of winter.

With temperatures being where they are, it'll be a few days before it's good to walk on, and a few weeks before we can put any serious weight on there. That's fine, I'm just glad it's finally in!
Concrete day! Concrete day!
So we've got concrete scheduled to come and get poured in the greenhouse this afternoon (yes, in the middle of December in Ohio).
After several failed attempts previously due to scheduling and weather, this is kind of our last shot... as one of the two local concrete companies has already shut down for the season. I guess nobody likes pouring concrete when it's 20 degrees outside?
We need to get the concrete poured, as we can't get the barrels set up and filled in there without a solid and stable slab to put them on. No barrels, no water. No water, no heat retention... which also means no using the greenhouse until likely next fall... not a very happy proposition around here.
Fortunately, the sun decided to come out today, after a long stretch of dreary cloudiness. I cleaned the snow off the poly panels first thing this morning, and it should be heating up pretty good in there now.
I'm hoping it can catch and hold enough heat to give the concrete a chance to set up properly. Fingers crossed...
Saturday, December 7, 2013
New Baker Creek Seeds Catalog!

Oh, it is a most happy day 'round here when the newest Baker Creek Heirloom Seeds catalog shows up.
When the winter days run short and the snow blows on us, at least we can look at amazing pictures of delicious vegetables.
Wednesday, November 27, 2013
DIY Project: Scrapwood Sawbuck
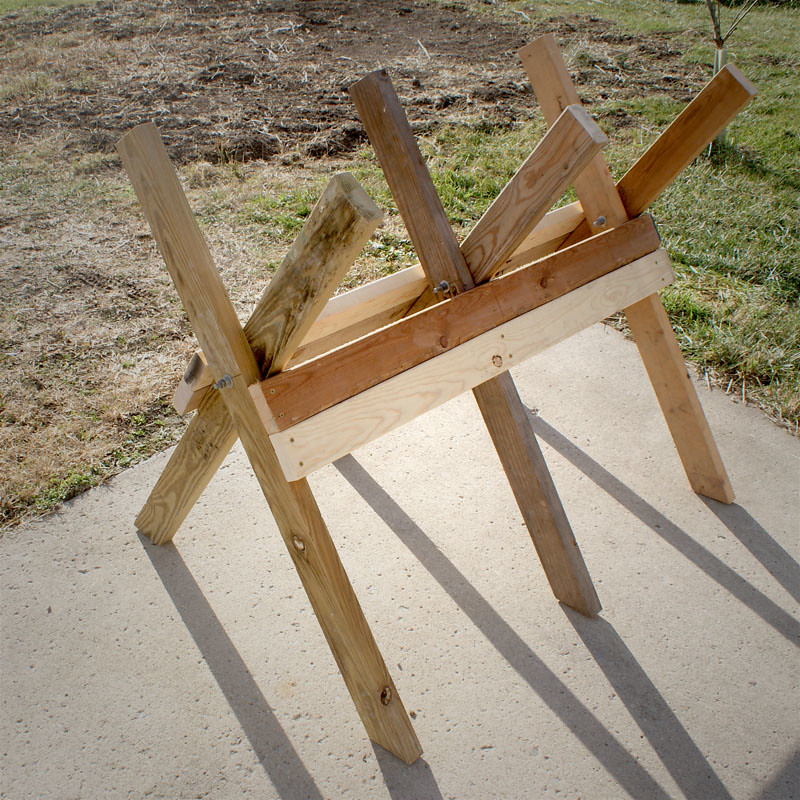
Put together a pretty solid little folding sawbuck today with a few dollars worth of hardware and some scrap 2x4s. Should make my next chainsaw session out in the woodshed a lot easier/safer.
Thinking of adding a few extra features to it, but we'll see how it works in basic form first.
Found the plans online, here.
Sunday, October 13, 2013
DIY Farm Project: Lawn Edging with Aluminum Gutter Flashing (October Update)
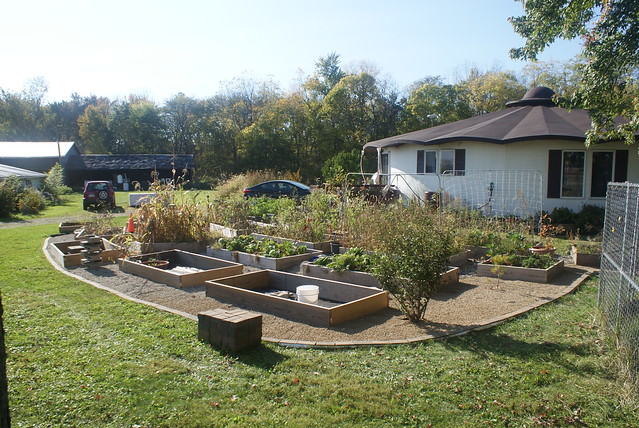
It seems like yesterday I was starting this project, and yet here we are midway through October already? Yeesh. Some bad weather and a flare up of some lower back issues had spared me from the gravel pile for a bit, but this project is on the list of things I wanted to get farther along before winter set in, so I decided to devote what was supposed to be a rainy day of indoor projects to getting some more edging done instead.
I got another 50 feet or so done, curving around back towards the house around the goumi bush and the Korean Stone Pine, around a 90 degree angle and running along the frontside of the two shade beds.
No new technical information to share, the technique is the same as before.
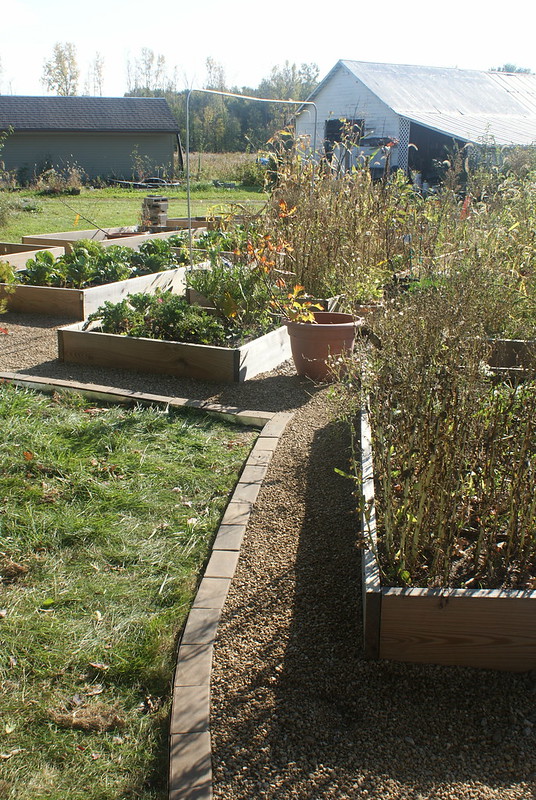
As a few months have gone by since the initial install, I've had a bit of a chance to put this system to the test, i.e. see how well it keeps the grass on the grass and out of the gravel. So far so good. The grass along the edge on the lawn side cleans up nicely with a quick pass of the string trimmer when it gets long, and it's still looking very nice. If I decided to forego the string trimmer at some point, I could still trim the edge by hand, or hit it with the propane torch.

Monday, August 12, 2013
DIY Farm Project: Lawn Edging with Aluminum Gutter Flashing
For the past few years we have spent significant time, energy and materials converting large areas of our overabundant lawnspace over to raised beds for annuals and herbs. Overall, this has been a success and a time-saver, but one of our biggest challenges has been dealing with the edge-space… where garden beds and grassy lawn meet. And our large numbers of beds mean we have a LOT of edge space to deal with.
We've tried a few different approaches, and learned some lessons the hard way. For example:
1. DO NOT have your raised beds directly against your lawn (i.e. no border between them). This is a recipe for a nightmare of upkeep, as the edge is difficult to keep trimmed and most types of grass are only too happy to send runners under the edge of your garden beds and into your garden soil. Nothing is more disheartening than carefully constructing raised beds, only to have them completely colonized by quack grass or Johnsongrass rhizomes within a year's time.
2. Grass and weeds are just as happy (and sometimes happier) growing on the topside of a landscape fabric/gravel combo as it was growing underneath it before you tried to destroy it by piling a bunch of heavy dark stuff on top of it. This arrangement certainly helps, but is no silver bullet.
In a fantasy dreamworld where money is no option, we'd simply purchase bulk quantities of fancypants milled aluminum edging material (which runs about $2.33/foot in it's basic, non-colored form BEFORE freight shpping), laughing while I light a cuban cigar with a burning fifty-dollar bill. Of course, then we'd probably also be paying other people to install it as well… also not happening.
In reality, we needed to devise a lawn edging "system" that met the following requirements:
- Non-degrading, non-toxic, lifetime-ish durability (i.e. not plastic)
- Equally capable of forming graceful curves and sharp edges
- Cheap and easily acquired.
- Relatively easy to prep/install without expensive specialized tools.
- Fireproof (so I can weed with our propane torch).
After a good amount of research, it looked like my material of choice was going to be aluminum gutter flashing. Looking online, I found a lot of instances of people discussing using aluminum gutter flashing as an edging material, but the few pictures I found looked like... well, they looked bad. I do believe there's something to this idea, and hoped that the results could be both practical and nice looking. So we're posting this up here to document how we decided to approach this project in the hope it might be helpful to others.
As with all our "How-To" segments from here at the farm (and most of the stuff we do), I must stress that this technique is essentially experimental. I am NOT saying that I know this is a time-tested method, or that I am an expert of any kind. I come up with stuff like this because I'm cheap and we prefer to DIY things around here whenever possible. If this ends up being a horrible catastrophe, I'll come back and update this with all the specific things I did wrong. That said... onward!
Materials:
- Landscape Fabric (I use DeWit Pro5 5oz weed barrier fabric because it is great).
- Lanscape Fabric staples
- Pea Gravel
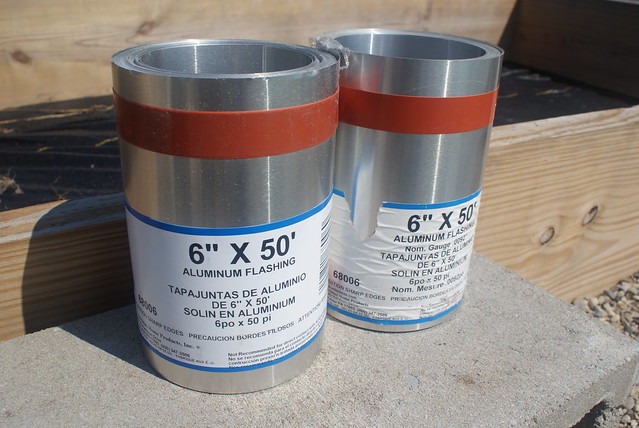
- 6" Aluminum flashing.
- Digging spade
- Power drill with 1/8" bit.
- Pop riveter
- GLOVES The flashing is very, very sharp. So sharp. Seriously, wear gloves.
- Thousands of bloodthirsty mosquitoes (not recommended, but we had them)
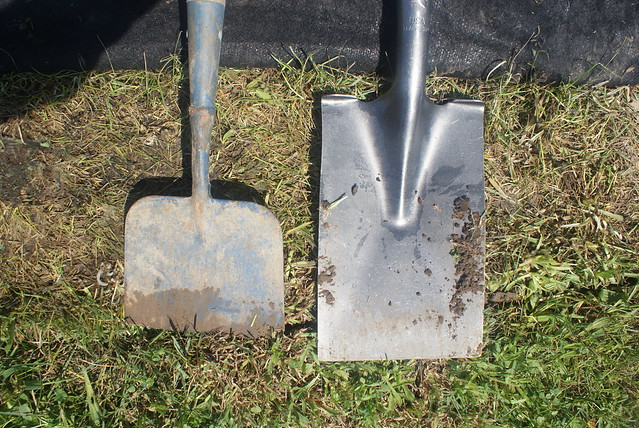
I started out first thing Saturday morning by sharpening my new spade. Most tools you can buy at Home Depot/Lowes, etc. nowadays are not sharpened at all when you purchase them. I suspect many people think that digging chores are awful at least in part because they're doing it with a dull tool.
I started by peeling back and weighting in place the landscape fabric that I had installed last weekend. You can see where it was killing the grass. I then mowed the area on the lowest setting, making sure the grass clippings were flying away from (not into) the garden beds.
I began digging the edge line, straight down to a depth of about 5". This will eventually become the line at which I will install the flashing, and will be the visual break between the bricks and grass... so taking one's time and making sure the curves are smooth and the straight parts are straight is crucial. We didn't have too many straight parts in this part of the garden, otherwise I would have laid them out with some rebar spikes and mason line.

After you've done a decent length, you can go back with your spade and dig down diagonally from the garden side, to meet the vertical cut you just made. You're essentially cutting out a thin wedge of sod/turf.
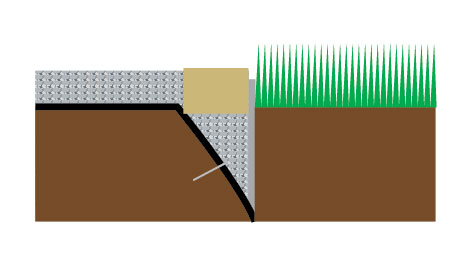
At this point it's a good idea to go through with a trenching shovel (if you have one) or a trowel and clean out all the loose dirt and debris out of the channel. Make sure the lawn side of the channel is as clean and straight/vertical as possible. From the side, you want it to look like this:


Here's a shot of the channel in progress. After I had dug and cleared a sufficient length, I pulled the fabric down taut into the channel and stapled into the slope. It's okay if it doesn't reach the very bottom.
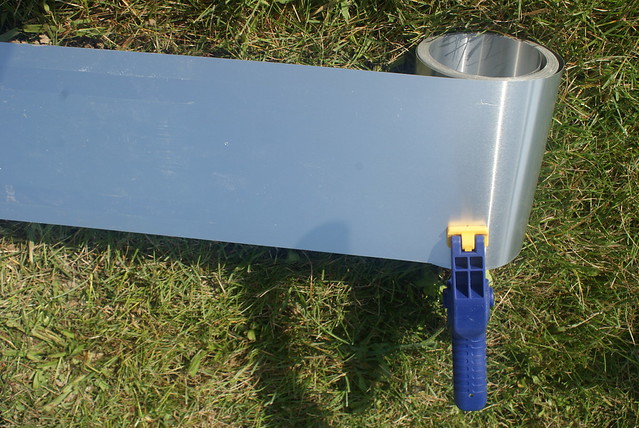
Then, CAREFULLY unroll your aluminum flashing. I can't emphasize enough how sharp the edges on this stuff are, or how important it is to wear real gloves when you're working with it.
I found that a spring clamp comes in handy if you want to unroll it in portions (it's a bit spring-loaded as it's packaged, and has a tendency to unwind quickly when unfastened).

Install the flashing in the channel. If you've done your digging straight enough and deep enough, this part should be easy. So now the channel should look like the diagram at right. The black is the landscape fabric, and the silver bit is the flashing.
Next, we want to fill the channel with pea gravel. This will be the structural bed on which our bricks will sit.

I continued this on around the edge of the garden... digging, clearing, stapling the fabric and placing the flashing, then filling with gravel and placing bricks. I found that it was helpful to carefully bend the flashing in towards the bricks above ground level... this helped minimize any potential gap between the brick edge and the flashing. If a brick is too low or high, you can level it by adjusting the amount of gravel underneath. After the bricks were in, I filled the garden bed walkways with gravel right up to the edge of the bricks.
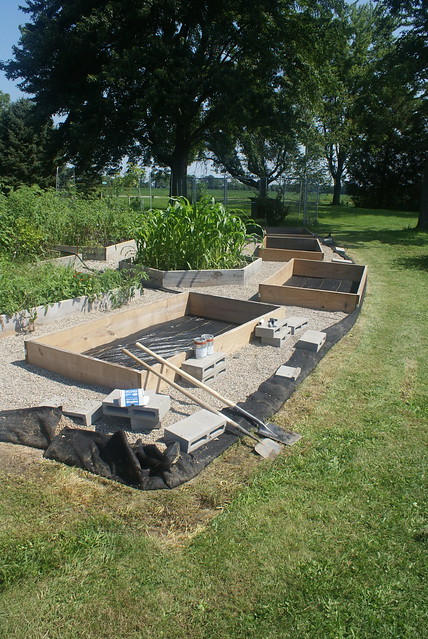
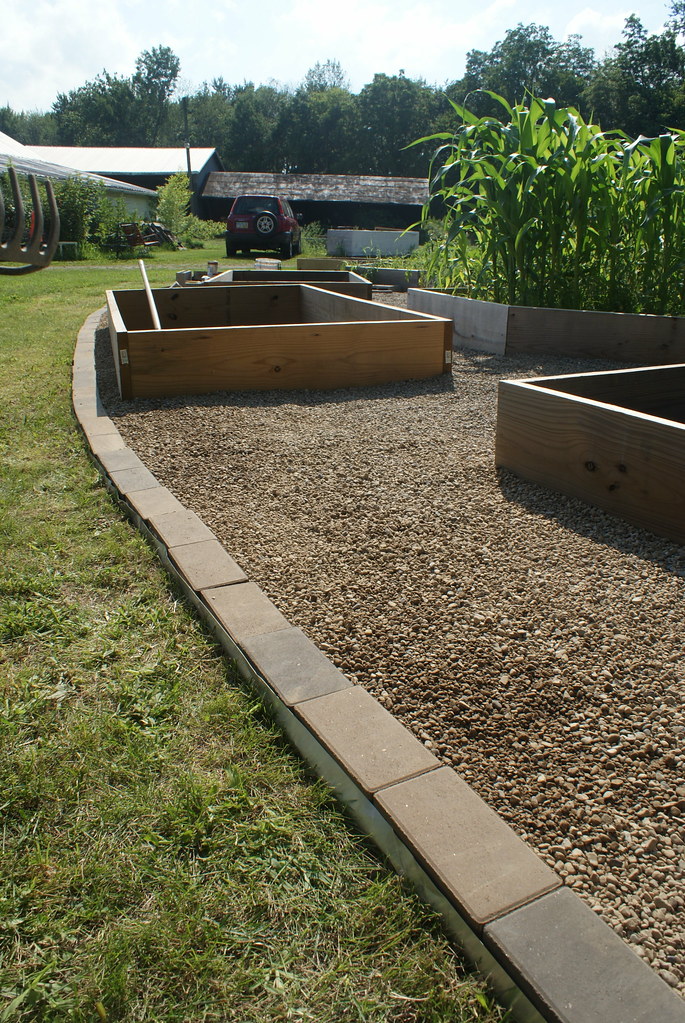
We've got a lot of edging left to do, but I'm pretty comfortable with the process now, and now that I've got the hang of things, it's going pretty quickly. Here's a shot of the long curved edge at the end of the day. I'm pretty happy with how it looks, and I'm hoping that it will hold up, and that the ability to weed along the edge with the propane torch will be a real timesaver in the future. I'll update the blog as we continue to install the edging around our raised bed spaces. As always, we welcome feedback, comments, hints, suggestions, or dire warnings. Or, drop us a line if you found this helpful!
Subscribe to:
Posts (Atom)